Sunday, January 25, 2009

Spaghetti With Meat Sauce


I've been hanging out a lot on Facebook lately. And so has Elle, from Elle's New England Kitchen. This past week she posted a picture (only on Facebook) of a rigatoni she made, and it looked really good. Shall we say that she inspired Inspired Bites? Yes!

So when we made plans for friends to come over for dinner and board games (and drinks!), I decided to make something similar.

I'll admit to you all that I didn't want to make dinner. It has been a really long, hard week, making midterms for 3 different levels of classes. I didn't stop working last night until 7:30 when the school musical began. I left school at 10:15 that night wondering what we'd do for dinner. But in talking to my friend about possibilities to order out, it became clear that I would need to cook. Living out in the boonies, we don't have too many choices, and I will not eat take out pizza with a bread crust and canned mushrooms.

I threw this together on Saturday afternoon and it made for a fabulous dinner. Joe made a garlic bread with naan, and we had a great bottle of dry red wine. Karen made a wonderful salad with toasted pine nuts, artichoke hearts, cucumber and tomatoes. We sprinkled balsamic vinegar and extra virgin olive oil over the top.

I'm going to eat every bit of the leftovers. I'm pretty proud of myself since I didn't use a recipe, instead making this one as I went along.


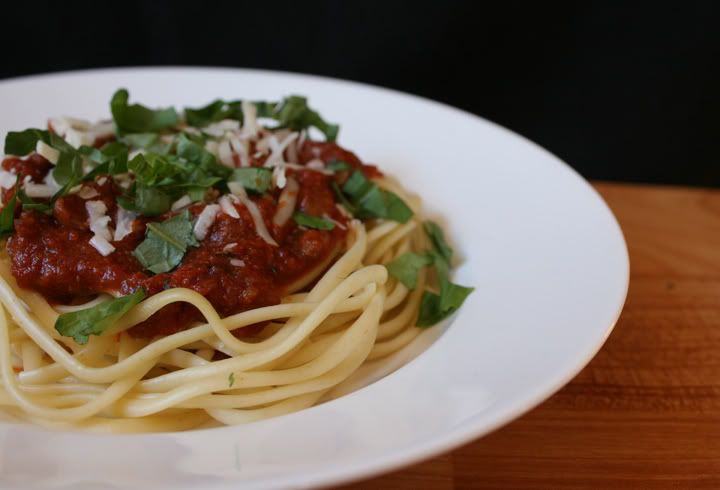
Spaghetti and Meat Sauce

3 tablespoons extra virgin olive oil
1 cup chopped green pepper
2 cups chopped sweet onion (I loves me some sauteed onion)
4 chopped cloves of garlic
8 ounces sliced mushrooms

1/4 cup tomato paste
2 (28 oz) cans crushed tomatoes
1/2 cup dry red wine
1/4 teaspoon salt
1.25 lb ground beef (85% fat)
1 (1.5 ounce) rind of Parmesan cheese)

one 2/3 ounce package fresh basil, chopped, plus more for garnish
salt, again, to taste (my taste was 1/2 teaspoon)

Add the 2 cans of crushed tomatoes to a dutch oven. It should be good and deep - my sauce tended to splatter, even on a low heat. Begin heating it up on a medium-low heat.

Saute the onions and pepper in the olive oil on a medium-high flame. Add the garlic towards the end.


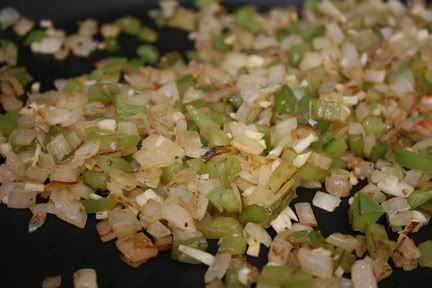
Place it in the pot with the tomato sauce.

Saute the mushrooms. Add it to the sauce pot.

Brown the beef. Pour it and the juices into the sauce pot.

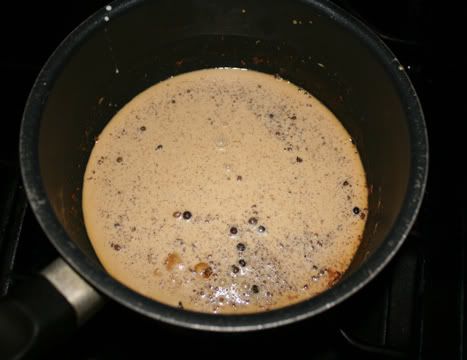
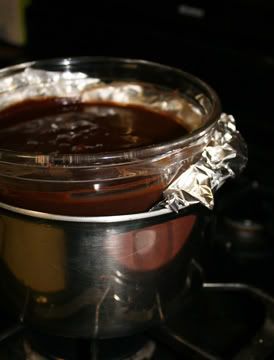
Add the wine, basil, tomato paste, and the rind of cheese. Stir it, cover the pot, and cook on low for 2 hours. Remove whatever rind has remained. Much of it will disintegrate into the sauce and flavor it wonderfully. Here's what mine looked like:


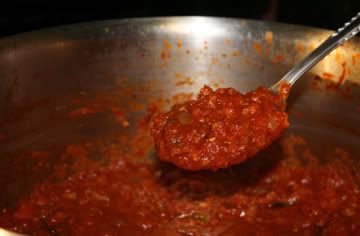
You should taste the sauce as you go and season it with salt and pepper to your liking. Depending on which type of cheese you use, you may not even need salt! My cheese wasn't salty, I guess, and not all of it fell apart, so this is when I added another 1/2 teaspoon of salt.

I used linguine instead of spaghetti. It's a little bit wider and flatter, but not as much as fettuccine. I like it.

Serve with Parmesan cheese and fresh basil on top.


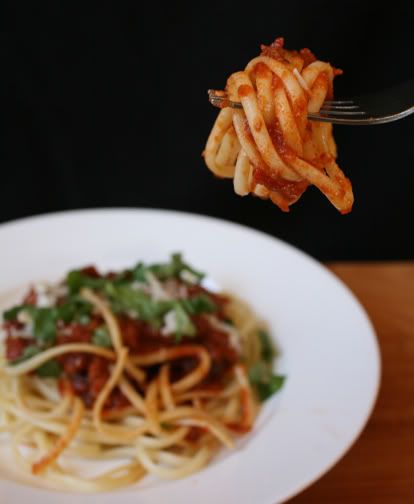
Mmmm, that's good stuff!

Spaghetti with Meat Sauce

I've been hanging out a lot on Facebook lately ...

See Spaghetti with Meat Sauce on Key Ingredient.

Saturday, January 24, 2009

Seafood Quesadillas


When I was in my teens, my family lived in Evansville, Indiana. My mom and I would frequent a chain of Tex-Mex restaurants (they called themselves Mexican) call La Hacienda. My favorite dish there was their seafood enchiladas, which were basically fake crabmeat rolled up in a flour tortilla and covered with a cheesey dairy sauce and sour cream. They were really good!!!!

Last week I happened to see this recipe (which I slightly adjusted) in a magazine advertisement for TransOcean Crab Classic. I gave it a try and I was happy because these quesadillas are very similar to the flavor I remember of those seafood enchiladas I loved so much.

Seafood Quesadillas
Adapted from TransOcean


1 cup chopped onion
10 twists of the pepper mill
salt to taste
a couple of shakes of red pepper flakes
a good handful of chopped, fresh cilantro
2 tablespoons lemon or lime juice
10 ounces chopped imitation crabmeat
Cheddar and Monterrey Jack cheese

Sautee the onions, salt, pepper, and red pepper flakes. Add them to a bowl with the seafood, citrus, and cilantro. Mix to combine.


Heat up a pan. When it's good and hot, coat it with spray oil (I used olive oil spray), and place the cheese-covered tortilla on the bottom. Top it with the seafood mixture.


Then add more cheese on top and another tortilla. Spray the oil on the top of the tortilla.

When the bottom tortilla is golden brown, flip over and brown the other side.


Place on a cutting board and cut your quesadilla into triangles. I do a cut across the middle, and then two across the diagonal, making 6 triangles.


I bet these quesadillas would be awesome with a mango salsa. But I just ate them plain.

This recipe makes 4-6 quesadillas (depending on how much seafood you use).


Seafood Quesadillas

When I was in my teens, my family lived in ...

See Seafood Quesadillas on Key Ingredient.

Wednesday, January 14, 2009

Sauteed Bok Choy


After making my Beef and Vegetable Stir Fry with Peanut Sauce, I had a good amount of bok choy left over. Bok choy is a Chinese variety of cabbage. It has long stalks and dark green leaves. It's pretty common in Chinese food.

I wanted to make something yummy to use the bok choy before it went bad, and I found just the thing. I found a nice little sauté recipe on Recipezarr, originally posted by Aimchick. I had all the ingredients on hand (that's awesome!) and it was quick and easy to prepare. I only made a few little adjustments to suit my taste. The result is very tasty and flavorful. Especially since I used my own homemade chicken broth!

It is hard to make bok choy look pretty (at least it is for me), but bok choy is a beautiful thing. It's has a great texture when sauteed - just a little crunch to it. And it makes for a healthy side dish, offering lots of vitamin C, calcium, and vitamin A. According to About.com, it "contains glucosinolates, which may prevent cancer." I like that!

Sauteed Bok Choy
Adjusted from Recipezarr poster Aimchick


Serves 4

1 head bok choy
, sliced, both white and green parts
1/3 cup onion
, diced
1 tablespoon grated ginger root

2 teaspoons olive oil

1/2 teaspoon sesame oil
1 teaspoon fish sauce

1 tablespoon rice vinegar

1 1/2 teaspoons sesame seeds, plus more for garnish

1/4 cup chicken broth
1 teaspoon low sodium soy sauce
crushed red pepper flakes (I like heat, so I did 5 little shakes of the container)

Before I rinsed my bok choy, I cut it into manageable sized pieces. It was about a foot long before I did that. I cut it into 4" sections. Then I put it in a deep bowl of water. I drained it and filled it up 2 more times, to make sure all the grit came off the stalks and the leaves.
You could use a salad spinner to remove the excess water. But I had time, so I let it dry by putting the stalks vertically in a colander.
Heat up a sauté pan or a wok on a fairly high flame. Add the olive oil, swirl it around, and then add the onion and ginger. Sauté the onion until it's tender (about a minute).

Then add remaining ingredients and sauté for about 8 minutes.

Garnish with sesame seeds.

Sunday, January 11, 2009

Italian Wedding Soup


Every winter it seems I buy can after can of Progresso Chickarina and Italian Wedding Soup. I love the stuff - they both taste so good and have a respectful amount of protein, and a nice low calorie count.

My quest this past week was to make a delicious soup - similar to Chickarina and Italian Wedding. I kept thinking that if I liked them so much canned, how heavenly would they be if they were home made? Ooh, and an added bonus is that I can lower the sodium count. FYI: one can of Progresso Chickarina has a whopping 2,000 grams of sodium! Ouch!

It took two soup-making attempts, but I ended up with the most awesome soup. I dare say it is perfection in a bowl, and the perfect food for a cold, snowy day .

My first try was good, not great. I decided that I would use a beef-pork mixture. I used 16 oz. beef and 4 oz. pork.

While the soup was good, I couldn't understand, why my fingers swelled like little sausages every time I ate it. One morning I couldn't even put on my wedding rings!

It turns out that I just wasn't thinking. I had used canned chicken broth, and I'm guessing it was loaded with sodium. Also, even though I went with more beef than pork, I could feel a light film of fat on my lips after eating it. And hey, it's the new year, and it's time to make up for that holiday eating. But if you don't have a problem with the beef/pork mixture, then that is the more traditional way to do it and it does have great flavor as well.

But I need to watch my fat intake, so I went back to the drawing board today and decided to lighten it up with turkey meatballs. And I would improve the flavor and have better control over the sodium if I made my own broth this time.

While rolling out the little meatballs, I was worried that I had over-done it with the egg plus the egg white. The consistency of the raw meatballs was so different when made with ground turkey as opposed to beef and pork. They were sort of sticky as I was rolling them in the palms of my hands. I added some extra panko bread crumbs, but I stopped at 2/3 cup and hoped for the best. And the best I did have!

I love this soup! I know that I will make it every winter from this day forward.


Italian Wedding Soup

One recipe of Home Made Chicken Broth
4 large diced carrots (I prefer a small dice for this recipe)
1 small head of escarole (only the tender leafy parts - I removed the tougher parts for this recipe)

For The Meatballs:
1 (20.8 ounce) package of ground turkey
1 small onion, grated
1 egg + 1 egg white
2/3 cup panko bread crumbs
1/3 cup chopped flat leaf parsley
2 cloves garlic
1/4 cup grated Parmesan
1/2 tsp pepper

Mix all of the meatball ingredients with your hands! Don't be afraid, just delve right in. Once all the ingredients are spread evenly throughout the mixture. Put a little splash of water on your palms and take very small amounts in the palm of your hand and make many little meatballs. The water will keep the mixture from sticking to your palms. I found it much easier to work that way. Here's mine:


Once all the meatballs are rolled, put them into the soup raw. As you add the meatballs, add 4 chopped carrots.

Crumble about half the chicken meat from when you made the broth into the soup. I felt that adding all of it was too much. I saved the other half and hope that it's good for chicken salad!

Cook the pasta half way separately in a different pot. Add it to the soup pot.

At the end, add the leafy parts of the escarole. Cook two minutes more so that the escarole wilts.


Serve with Parmesan cheese and perhaps a nice hunk of crusty bread!


Italian Wedding Soup (with turkey meatballs)

Every winter it seems I buy can after can of ...

See Italian Wedding Soup (with turkey meatballs) on Key Ingredient.

Home Made Chicken Stock

Home made chicken broth is far superior to it's canned counterpart! It has an enormous amount of flavor. I noticed the beautiful fragrance almost immediately after the broth began to boil. The entire house was filled with a beautiful scent that made our mouths water.

I originally made this chicken broth for my Italian Wedding Soup. I reserved a small amount and used it the next day in my Sauteed Bok Choy.


Chicken Broth

1.25 lb chicken drumsticks, skin removed
1 lb boneless chicken breasts
15 cups water
1/2 teaspoon salt (I added 1 1/2 teaspoons more afterwards)
1 small onion - cut in half
2 cloves garlic - cut in half
1/2 cup chopped parsley (flat leaf)
3 ribs celery - with the leaves
3 carrots
12 peppercorns
1 bay leaf

Put all ingredients in a dutch oven. Bring it to a boil. Then turn the flame to low and allow to cook for 2 hours - covered.


Strain the broth through a colander, and if there are still particles you want out, again through a sieve.

You can freeze this broth and have it on hand. It will keep well.

Sunday, January 4, 2009

It's Truffle Time!

I finally made some truffles, folks! I have such a feeling of accomplishment for finally reaching that little goal.

I've wanted to make chocolates for quite some time. The first time I tried to make them was a couple of years ago. I had candy molds and all, but the experiment was a complete flop, if I do say so myself.

The second time I tried to make them was early in the fall (October 19th to be exact), but the ganache seemed to be far too soft to work with. Failure number two kind of hurt.

But like the little engine that could, I tried again just before New Year's Eve. And just like that little engine, I got up that hill and successfully reached the end game! Ahh, truffles. And they are not just good, they are fantastic. I gave them to my friend, Karen, along with her Christmas cookie package. Then, today, I brought some to my friend, Maureen. She called to tell me that they were sinfully good and comparable to any of those expensive Godiva chocolates she's had. Well, that comment really made my day!

I made two types different kinds of truffles:
Gingerbread Truffles, which used a traditional type of ganache made of cream and chocolate, and Cream Cheese Truffles, which I flavored two ways: Raspberry and Amaretto-Honey.

See my post,
About Melting Chocolate if you aren't quite sure about the process.
I bought some inexpensive tools and supplies at Michael's to help me out:

  • a candy dipping set (tools to roll the truffles in the melted chocolate and remove and set them properly
  • couplers and tips
  • parchment pastry bags
  • decorating candies

If you are unfamiliar with these and want to learn about them, see my post on Candy Making Tools.

Because the recipes are different, I'm going to put them in different posts:


Cream Cheese Truffles in Two Flavors


I first saw a cream cheese truffle recipe in the Kraft Food and Family magazine. They certainly looked good in the picture. But for whatever reason, I didn't make it.

Christmas came and went, and I still wanted to make truffles. I browsed around in other blogs and kept seeing those cream cheese truffles with all sorts of variations.

So I did it. I made the cream cheese truffles, with higher quality chocolate (Callebaut). Yum! Then I split the batch up and made two flavors, Amaretto-Honey and Raspberry.

Cream cheese truffles are easy and taste divine!

Cream Cheese Truffles
Adapted from Craft Food and Friends

1 (8 oz.) package cream cheese, at room temperature
3 cups confectioner's sugar
10 oz. high quality dark chocolate (I used Callebaut)

12 oz. high quality chocolate for coating the truffles
candies and white chocolate for decorating

To make the "ganache", blend the cream cheese and confectioner's sugar in a mixer.

Melt the chocolate in a double broiler. See my post, About Melting Chocolate, if you would like more information on this procedure.

Add the melted chocolate to the cream cheese mixture and mix until completely combined.

At that point, I wanted to split the ganache and make two different variations.

Amaretto-Honey Cream Cheese Truffles
1 Tbs. honey
1 Tbs. amaretto
1/4 tsp. almond extract

Raspberry Cream Cheese Truffles
In the other half, add 2 Tbs Dickinson's seedless red raspberry preserves. I like these preserves because they have a strong, wonderful flavor.

I didn't have Chambord in the liqueur cabinet, but I could see 1 tablespoon Chambord and 1 tablespoon preserves.


Whichever variation you make, roll the ganache into 1" balls. You could also use a melon-baller with the little metal piece that slides across to release the ball. I wish I would have had that melon-baller because I had a hard time getting a perfectly round shape:


Some of my truffles weren't round enough, and that ended up showing when I dipped them in chocolate.

Chill the truffle balls for an hour. They should be as solid as possible before you dunk them in melted chocolate.

Melt the other 12 ounces of chocolate in the top section of a double broiler on a low flame. If you have tools to work with the truffles and get them in and out of the chocolate, those would be quite handy. See my post, Candy-Making Tools, if you want to see what I used.

Work quickly to dunk and cover all of the truffles in the chocolate and place them on a non-stick surface such as a Silpat mat or wax paper. Don't decorate until all the truffles are done because you risk burning the chocolate if you don't work quickly.

Once all the truffles are completed, decorate by adhering candy, coarse sugar, or whatever decorations you want to use. I also used melted white chocolate in a piping bag fitted with a coupler and a piping tip. Those items are also pictured in my post, Candy-Making Tools.

I recommend keeping these truffles chilled. You can package them in 1" candy cups and put them in decorative containers - that is if you want to give then away and impress your friends and family.

Your truffles will be enjoyed by all!

Gingerbread Truffles

I love gingerbread. In my recent cookie baking for Christmas, I think the gingerbread cookies were my favorites!

Shortly after Christmas, I set out to make truffles. As I poked around some of the wonderful bloggers posts out there. I ended up at Shaved Ice Sundays, where this blogger did a post on a variation of cream cheese truffles.

Looking further, I found the blog, Bitter Sweet, with a variation of cream cheese truffles that had gingersnaps in them. Mmm, truffles and gingersnaps. What a wonderful combination. What a wonderful recipe.

But I really wanted to make a traditional type of truffle, with a ganache made of melted chocolate and cream. So I searched further and found this Gingerbread Truffle recipe at Epicurious.com from Bon Appétit magazine.

These truffles are absolutely amazing!


Gingerbread Truffles
Adapted from Bon Appétit
Makes about 2 dozen

3/4 cup whipping cream
10 whole allspice
10 whole cloves
1 tablespoon molasses
1 1/2 teaspoons grated peeled fresh ginger
1/2 teaspoon ground cinnamon
Pinch of salt
7 ounces plus 12 ounces dark chocolate (I used Callebaut)
7 ounces plus 12 ounces high-quality white chocolate (they recommended Lindt or Perugina. I used Ghiradelli), chopped
1/2 cup chopped candied, uncrystallized ginger

Bring first 7 ingredients just to boil in heavy medium saucepan; remove from heat and let steep 1 hour. I couldn't decide whether to cover it or not. In the end I didn't.


Assemble your double broiler to melt the chocolate. A double broiler is really just a pot with a little bit of watter in it, and a bowl on top. You can see my post on
candy melting if you want to see how I set mine up.

Once the water boils in the lower pot, add the white chocolate to the bowl/pot on the top level of the broiler. Let it get started heating up and the edges of the pieces starting to melt before adding the dark chocolate. I'm advising this because I found that the white chocolate took longer to melt, and I risked burning the dark chocolate while I waited for the white chocolate to finish melting. Be sure to keep the flame on low and stir often while the chocolate melts. Remove the top bowl from over water.

Pour the cream mixture through a fine strainer and into the chocolate. Discard the solids that are left in the strainer. Stir until the new mixture is completely blended. Then stir in the ginger.

I got my uncrystallized ginger at Trader Joe's.

Cover and chill your ganache until it's firm, at least 3 hours. I left mine in the fridge over night.

When you remove your ganache from the refrigerator, you may find that it's almost rock-hard! Don't worry. Just let it sit on the counter for an hour or so, so it becomes soft enough to work with it.

Line a baking sheet with parchment. Using 1-inch melon-baller, scoop filling and roll between palms to form balls. Truth be told, I used a rounded tablespoon.


But a melon-baller would have been better - the kind that's like an ice cream scoop that has the little bar that helps to release the ice cream. My balls would have been more uniformly shaped, and that does matter! If they look awkward before you dip them, they will look awkward after you dip them too.

Place the truffles on the parchment. Chill them at least 2 hours. You want them to be good and cold when you dip them in the melted chocolate.

When it comes time to dunk the truffles in chocolate, you need to work quickly. Dunk all of them in the chocolate before you decorate, and cover them all as quickly as possible. There's plenty of time to adhere toppings before the melted chocolate sets. But if you wait too long to dunk them all, you risk burning the melted chocolate.

See my post,
Candy-Making Tools, if you are unfamiliar with them and want to see pics. I was glad I had them, and they were not an expensive investment.

I placed my truffles on a Silpat sheet, but I'm sure that wax paper would be just fine. Then I decorated.


I loved my truffles. It was a great first experience. But in the future, I will get the proper melon-baller and I will work more quickly to dunk the chocolate. My truffles looked nice, but there was room for improvement as well.


Candy-Making Tools

To help me to make truffles that look presentable, I went to Michael's and bought some inexpensive tools and supplies at Michael's to help me out:

  • a candy dipping set
  • couplers and tips
  • parchment pastry bags
  • decorating candies
  • paper candy cups

This is a candy dipping set:


I don't know if I used them the right way, but it worked for me. I used the rounded end to roll the truffle around in the melted chocolate. Then I used the one with the prongs on the end to lift the truffle out of the chocolate and place it on my Silpat mat (you could place yours on wax paper - that's fine!). I liked it because the truffle just slid off of it with ease.


This bag of parchment triangles (perhaps a lifetime supply!) cost just over $6.00. I used it to pipe the white chocolate over the top of the truffles.


These are the couplers and tips:


The couplers fit on the end of the parchment bag and the tip comes out from the inside. Here's the result:


And I got some valentine's decorating candies - hearts, pink and white balls, and colored sugar.

Then I placed each truffle in a paper candy cup (the 1" size) and put them in a box.


I'm no professional candy decorator, but I was happy with the results.


About Melting Chocolate


When making truffles, such as the Gingerbread Truffles and the Cream Cheese Truffles I made, you will need to melt chocolate for both the center and the topping. There are two ways to melt chocolate:

  • the microwave
  • the double broiler method.
I prefer the double broiler method when I'm melting a large amout of chocolate.

Don't worry if you don't have a set of pots dedicated to double-broiling. You don't need it! I made this little double broiler out of what I had:


Because the glass bowl was too small for the pot, I made a tinfoil snake (I didn't roll it tightly - you want room for the bowl to mold to it). Just put the snake on the outer rim of the pot. Add about an inch of water to the bottom of the pot.

Then place the bowl on top and, voila!

I also found that I had a Corell bowl that fit perfectly:

Oh! That flame in the picture is too high! I lowered it just after I took the shot.

Note: Chocolate burns easily! Use a low flame and stir often.

Notes on white chocolate: White chocolate takes longer to melt than dark chocolate. If you combine white and dark (as in the gingerbread truffle recipe), be sure to add the white first. I also noticed that white chocolate seems to harden faster when removed from heat.


I did, however, use the microwave to melt the white chocolate that I used to decorate my truffles:


Microwaving White Chocolate
I only use the microwave to melt my chocolate when there is a small amount to be melted. I was trying to melt about 2/3 cup of white chocolate chips. The first time, I let the microwave run for 30 seconds before stirring. BAD IDEA! The chocolate burnt and was unusable.

The second time, I stirred every 10-12 seconds, even before the chocolate really started melting. That worked out perfectly.

Thursday, January 1, 2009

Beef And Vegetable Stir Fry With Peanut Sauce


I got my new Eating Well magazine in the mail yesterday and was instantly drawn to this recipe.

While I always strive to meet a certain amount of protein each day, I'm reflecting upon my less-nutritional food choices as I struggle through the holidays. My inner child wants to make and eat a bunch of sweets, and my adult self wants to satisfy my cravings with something more substantial and satisfying.

Truth be told, I seem to fight with myself a lot lately to keep from ordering lo mein from my local Chinese take out place. I just love the stuff, but I know it's bad by the way my lips are slicked with oil after just one bite, and by the way my fingers, hands, and feet are completely swollen the next day from all that sodium.

So when I saw this recipe, it appealed to me because it has those Asian flavors that I crave, and it was pictured on top of a bed of udon noodles. But at the same time, it was a nice change of pace - beef was the protein. And I so seldom cook with beef.

The sauce looked rich, in a healthy sort of way. It has orange juice in it and peanut butter (the natural stuff, which is good because we always have it here). And to save my pudgy little fingers, I cut down on the soy sauce in the recipe and used the recommended low sodium type.

As for the noodles - I went to the wrong grocery store to get them. So instead of udon, I ended up with write rice, but that's just fine too!

Beef & Vegetable Stir-Fry with Peanut Sauce
Adapted from Eating Well Magazine

Makes 4 servings

¼ cup smooth natural peanut butter
⅓ cup orange juice
2 tablespoons reduced-sodium soy sauce
1 tablespoon rice vinegar
4 teaspoons canola oil, divided
3 cloves garlic, minced
2 teaspoons sesame oil, divided
1 pound sirloin steak, trimmed and thinly sliced (see Tip)
3 large stalks of bok choy plus the leaves of one more
2-5 tablespoons water
2 medium carrots, grated
¼ cup chopped unsalted roasted peanuts (optional)

In a bowl, whisk together the peanut butter, orange juice, soy sauce, and vinegar. When I did this I didn't feel too confident about the sauce. It seemed like the peanut butter was flecked through it and the liquid seemed too thin. But it was thicker when I went back to it later.
Because the ribs of the bok choy will need longer to cook than the leaves, separate the leaves from the ribs of bok choy. Slice the ribs in even sized pieces, about 1/4 inch thick. Then roll up each of the leaves and cut across the rolled leaf, each cut about 1/2-3/4 inch thick. Set aside.

Heat a large pan or a wok over a medium-high flame. Add 2 teaspoons oil and coat the pan. Add the garlic, 1 teaspoon of sesame oil, and the steak and cook, stirring,until the beef is cooked about 85% of the way. Remove it, with the pan juices, and set it aside.

In the same pan, heat up another 2 teaspoons of oil. Add the bok choy ribs and saute them until they are tender and slightly browned. Add the remaining teaspoon of sesame oil and toss to coat. Then add the carrots and cook about 3 minutes more so that the carrots are partially cooked and lightly browned.

Return the beef and juices to the pan and reheat for a minute or two. Add the sauce and toss to coat.

Serve on a bed of white rice or on top of udon noodles. Garnish with the optional peanuts.


Tip: For thinly sliced beef, freeze for 30 minutes to make it easier to cut into very thin slices.


Beef and Vegetable Stir Fry wit Peanut Sauce

I got my new Eating Well magazine in the mail ...

See Beef and Vegetable Stir Fry wit Peanut Sauce on Key Ingredient.