Monday, January 19, 2015

Smokey and Spicy Black Beans with Ham


Boy, does my kitchen smell good right now!

Last week, I got the Penzey's Spices catalog in the mail.  I do love Penzey's Spices--everything is super-fresh. What a difference fresh spices and herbs make when you cook and bake with them.  And surprise--it costs less than supermarket spices.  There are some, limited Penzey's Spices locations, but they also are available in other stores and by mail order.  But really, the Penzey's online catalog is vast, and a visit to a store is fun.  


Mixed among the list and pictures of the herbs and spices, is a good selection of recipes in each release of the catalog.  A recipe for Carolina's Cuban Black Beans gave me the inspiration to make this dish.  The original recipe was vegetarian, but I wanted to add ham.

I ended up adding supermarket ham steak.  It actually wasn't my first choice.  I wanted to add a ham hock, which would have been much more fatty and smokey. So I guess I'm glad I couldn't find one.  It was due to the lack of the smoked ham hock that I added the chipotle peppers.  Good move!  (pats self on back)

Chipotle peppers start out as jalapeños. The manufacturers dry them and smoke them.  You can buy them that way, but you can also get them canned in adobo sauce, which is what you need for this recipe.  The adobo sauce rehydrates them, and quite frankly, makes them amazing!   You can find cans of chipotles in adobo sauce in the Mexican foods section of the grocery stores.  I think they are pretty widely available.  I put them next to the tablespoon so you can see the size.  But don't be fooled, these things pack a serious punch! I started out this recipe with two.  I ended up adding a third, but you might not like it that way, so start small.  As the beans cook down, you can always add more.  And if you want to cut down on the spice, slice them down the middle and scrape out the seeds. That would help.  But keep it all off of your fingers.  The heat stays on your skin for a while, and if you rub your eyes after touching them, that would hurt.


The recipe in the catalog called for putting the garlic cloves, cumin, and a little salt into a mortar and pestle.  I don't know about you, but I don't keep those in my kitchen.  So, instead, I minced the garlic, added the cumin and a pinch of salt, and then minced the crap out of it for a while.  I ended up with this:


I used dry turtle beans (as opposed to canned).  I had plenty of time, so I soaked them overnight.  In fact, I ended up going out to see a movie and came home really late, so they soaked a second night.  That was not a smooth move.  If you ever find that happens to you, remove the beans from the liquid after the first night.  I saved the dish, cooked it less, reduced liquid, and cooked uncovered to get some of the liquid to cook down.  That worked.

Oh, the Penzey's recipe used a shortcut to soaking the beans--just in case you want to do it all in one day.  Cover them with water i a large pot and boil for 2 minutes.  Turn off the heat and let stand, covered, for one hour.  Then drain them.

Onto the results:  Those are some mighty delicious beans!  I'll definitely make them again. In fact, I could see making them several times a year for the rest of my life.  I'm highly recommending this recipe!


Smokey-Spicy Black Beans with Ham  
(serves 8)

1 16-oz bag of dried black beans (aka: turtle beans)
water for soaking
4 cups chicken stock (I used unsalted)
3 cloves garlic
1 Tbs ground cumin
pinch of salt
2 Tbs extra virgin olive oil
1 medium yellow onion, chopped 
1 large green bell pepper, chopped
jalapeño, chopped, seeds removed
1 Tbs distilled white vinegar
2 whole bay leaves
1 1/2 Tbs herbes de Provence 
14 ounces hickory smoked ham, chopped
2-3 chipotle peppers in adobo sauce, minced
sea salt to taste (maybe 1/2 teaspoon)

Wash off the black beans and soak them in a large bowl overnight.

Mince the garlic.  Add the cumin and pinch of salt, and mince it as much as you can. Optionally, you can make a paste, crushing the garlic, cumin, and salt using a mortar and pestle.

In a large pot, heat the chicken stock, soaked beans, vinegar, bay leaves, and herbes de Provence.

While the beans, liquid, and herbs heat up, add the extra-virgin olive oil to a large skillet. Heat it on medium-high and add the onions, bell peppers, jalapeño, and garlic mix.  Saute until the onions and peppers brown some. browned.  Transfer them to the pot of beans.

Add the ham, chipotles, and salt.  

Cover and simmer until the beans are tender, about 2 hours.

It's great on top of a bed of white rice, but if you don't do rice, put the beans in a bowl and enjoy!

The Nutrition Facts are just for the beans and ham.  I didn't add in the rice since you may not, or if you did, you might use less or more than I would.
Nutrition Facts
Servings 8.0
Amount Per Serving
calories 185
% Daily Value *
Total Fat 7 g10 %
Saturated Fat 2 g8 %
Monounsaturated Fat 2 g
Polyunsaturated Fat 1 g
Trans Fat 0 g
Cholesterol 14 mg5 %
Sodium 411 mg17 %
Potassium 399 mg11 %
Total Carbohydrate 20 g7 %
Dietary Fiber 6 g23 %
Sugars 2 g
Protein 13 g26 %
Vitamin A4 %
Vitamin C29 %
Calcium2 %
Iron9 %

Thursday, March 4, 2010

Irish Soda Bread


Irish soda bread is awesome, and it's that time of year when the supermarket starts stocking it and the recipes are in every food magazine and Website. So I'm joining the crowd. It's hard to believe that up until past week, I've never made it. According to Irish chef Rory O'Connell (in Bon Appetite's online article), both the white and the brown Irish soda breads are traditional, and butter was not an original ingredient. The recipe I read about was made with 50% wheat flour and had butter, but not too much, and that's nice compromise in my mind.

The recipe came to my attention in the doctor's office. That seems to be when I get inspired to cook - looking at the recipes while I wait for my appointment (just seeing how my wrist is doing). This time, I brought along the latest issue of Bon Appetite. There was a fabulous article about Andrew McCarthy's (the actor) search for the Irish soda bread of his youth. It was a great read and the recipe was a tempting one for me. Though I had every intention of disgracing Andrew McCarthy's concept of what Irish soda bread is by adding nuts and currants.


The results were mixed. Things I did like were the oat flour and walnuts.

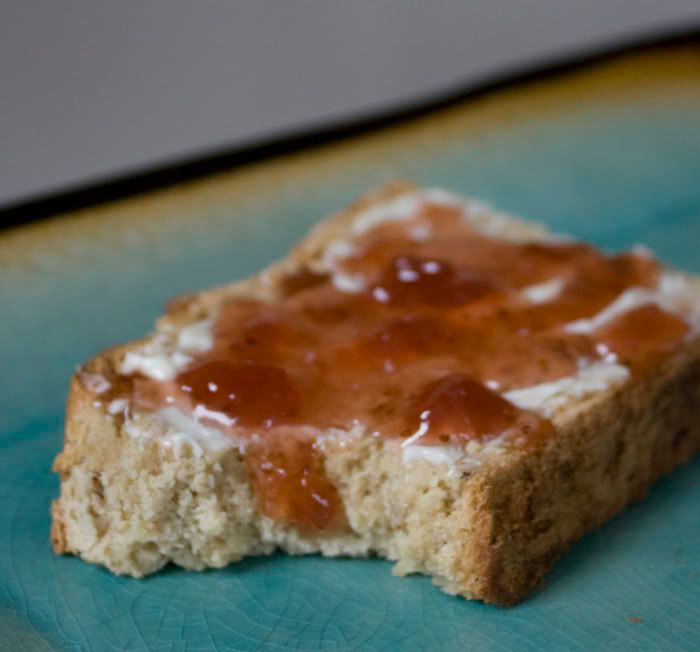
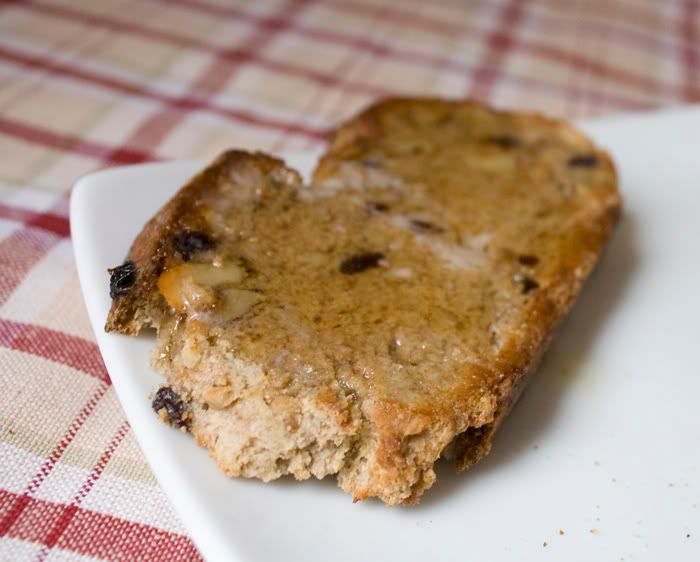
But there were issues with the dough being too dry, my overworking it, and the difficulty cooking it through without burning on the outside (I scrapped the worst parts of the piece in the picture).
Based on the issues with the first loaf, I also made some changes which worked out well. I was pleased with the loaves when I took them out of the oven.


The flour mixture was 2 1/2 cups of white, 2 1/2 cups wheat, and 1 cup oat. If I were to make the recipe a third time, I would make change it to 2 1/2 cups white, 2 cups oat, and 1 1/2 cups wheat. If I don't become completely sick of Irish soda bread, I see a third batch in my future!


Irish Soda Bread
Inspired by Bon Appetit


2 1/2 cups all purpose flour
2 1/2 cups whole wheat flour
1 cup oat flour
(note: I also enjoyed 3 cups white flour and 3 cups oat flour)
1/2 cup (packed) brown sugar

1 teaspoon baking soda

1 teaspoon baking powder

1/4 cup (1/2 stick) chilled margarine or butter, cut into 1/2-inch cubes

2 cups buttermilk + 1/4 cup reserved to the side in case the dough is too dry

2/3 cup currants

1 cup toasted and chopped walnuts

Preheat your oven to 400°F.

Whisk the flours, sugar, baking soda, and baking powder in medium bowl to blend. Add the butter and cut it into the dry ingredients with a pastry blender (aka dough blender). It will be ready when the bits of butter are the size of peas.

Add the buttermilk and stir until the ingredients are just blended. There will be clumps at this stage. But if you notice that there is no way that the dry ingredients are going to be able to become one with the dough, you should immediately add more buttermilk.

Turn the dough out onto lightly floured work surface. Knead until the dough comes together, about 10 turns. Be careful not to overwork the dough!!! If you kneed it too much, the bread will be tough.

Shape the dough into two 6" rounds and cut large "x", 1/3 inch deep, in the top of the dough.


I read that cutting the "x" on the top serves several purposes. For the bread, the cut helps the bread cook because it is at the thickest part of the bread. For the people of Ireland, it signifies the cross, and is a way that the bread is blessed. It also is a symbol for breaking the bread - which is easier to do once the bread is baked.

Place dough on prepared (oil-sprayed) baking sheet. Mine baked for 42 minutes, but I suggest checking the dough's progress at 35. I did the toothpick test, but with a wooden skewer. Poke it into the thickest part of the bread, and you'll know it's done by a lack of resistance when you pull it out, and when you look at it, it's clean (there's no dough on the toothpick/skewer).

Let it cool completely before cutting it.

My favorite way to eat it is toasted, with butter and honey.


Saturday, January 30, 2010

Roasted Pears Topped With Almonds, Raspberries, and White Chocolate Yummies


I'm so happy that this is my first recipe of 2010. It represents the way I'd like to cook and eat this year.

First of all, it's absolutely delicious! And it looks elegant, so you can serve it at the finest dinner party. Another plus was that it is quite simple. There really aren't a lot of ingredients, and you can have everything ready to assemble by the time the pears come out of the oven.

I don't know about you, but I need the "simple" in my cooking repetoire. My life is overwhelmed with minutia. But I do not want to cook the semi home made way. I want to cut down on processed foods and overwhelming amounts of sodium and chemicals. I believe that foods taste better when they are natural, and I feel better about eating them.

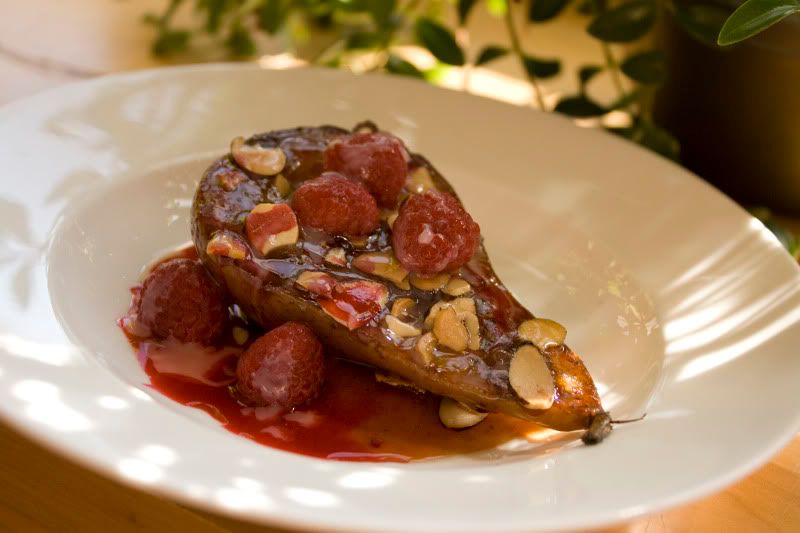
I decided to use organic frozen raspberries for my version of this recipe. It's the dead of winter, and while fresh raspberries were available, they were quite expensive and the quantity was small. I got about twice the amount of rasperries, and with the juice, I was able to make a 2nd sauce - a raspberry reduction. Here it is in all it's juiciness:


It was pretty spectacular. If you want to make the sauce, just though the raspberries. Strain out the juice while preserving the best of the berries for decoration. With some of the less-beautiful berries, put them in a sieve and use a rubber spatula to press out all the juice. You would be smooshing the berries to do this. Then put the juice in a small saucepan and boil it down to about 1/2 of the original amount of juice. If you wanted to, you could add some sugar. I didn't.

This recipe uses Vietnamese Cinnamon, aka Saigon Cinnamon. It is not the same as regular cinnamon - it's more pungent and complex. Maybe some of you can buy it in the grocery, McKormick does distribute it. But I prefer to order my spices online. I get mine from Penzey's Spices. They do have a few stores, which I hear are an incredible experience, but they also ship. My link is to the Vietnamese Cinnamon, but they sell every kind of spice, and they are fresher than anything you can buy in the grocery store, and most likely much cheaper per weight.

  • Penzey's Spices: A jar of 1/4 cup (7 ounces) of the cinnamon is $3.25.

  • McKormick on the shelf at Stop and Shop supermarket: only 1.5 ounce (the regular tall-size glass jar) costs $5.98.

  • Amazon.com: Spice Islands Saigon cinnamon, the same size (7 ounces), is 5.80.

  • King Arthur Flour: just 2 oz. cost $4.50


Roasted Pears Topped With Almonds, Raspberries, and White Chocolate Yummies

Inspired by Cat Cora (for McKormick)

1/3 cup brown sugar, packed
1 teaspoon Vietnamese cinnamon
1/4 teaspoon nutmeg
1/4 teaspoon ground cloves
2 pears, firm, halved with cores removed
2 tablespoons butter, melted
3 tablespoons heavy cream
2 ounces white chocolate, chopped
1/2 cup sliced almonds, toasted
fresh or frozen raspberries

Preheat the oven to 400 degrees. Place the pear haves, cut side up in an 8 x 8 inch baking dish sprayed with cooking oil. Brush the tops with butter and drizzle some more into the cavity, but leave as much as you can for later (I used half the butter).

Mix the sugar and spices in a small bowl and then sprinkle half of the mixture evenly over the pears.

Bake for 15 minutes. If your butter, sugar, and spices have fallen off of the pears, use a brush or spoon to baste the pears with it again. Sprinkle the remaining sugar mixture on top, drizzle with the remaining butter, and bake for another 20 minutes, or until the pears are tender.

While the pears are cooking, bring the cream to a boil in a small pot over medium heat. Take the pot off of the flame and add the white chocolate, stirring until it is melted and the sauce is smooth.

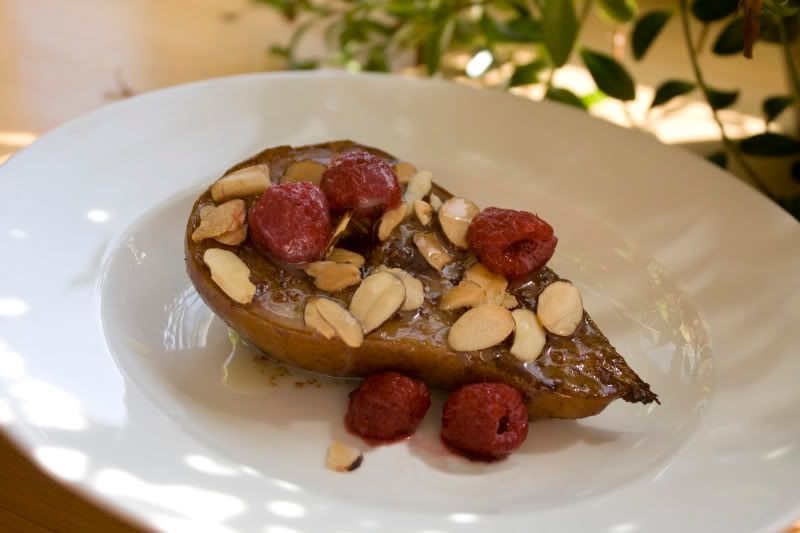
To serve, place a pear half on a dessert plate or shallow bow. Spoon any of the butter/sugar mixture from the pan over the tops and sprinkle with the almonds. Then drizzle the cream and chocolate mixture over it and top with the berries.


Roasted Pears Topped With Yummies

I'm so happy that this is my first recipe ...

See Roasted Pears Topped With Yummies on Key Ingredient.

Friday, December 18, 2009

Winter Squash- Black Bean Bake with Meat


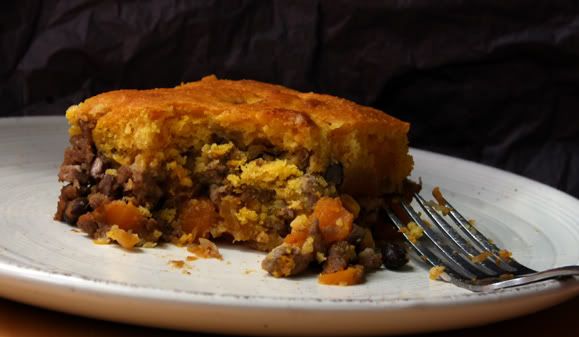
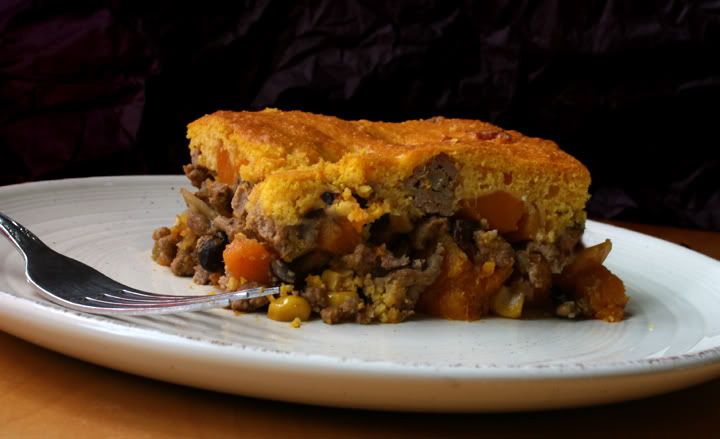
Watch out! This casserole is dangerous . . . . Dangerously irresistible, that is! I've made it twice in the span of a week, and I'm about to make it a 3rd time.

The first time, Joe and I ate it. And we did a good job of it. It was mostly gone the first night. Definitely gone the next day.

I made it yesterday to give to a friend, but as I was finishing the meat part of it, Joe called and said he needed a dish for his office Christmas party the next day. So since it was already made, he got that batch and I'm about to make it a third time for my friend whose husband is in the hospital. I figure she doesn't want to cook right now, and she will enjoy and appreciate some healthy and delicious home cooking. And her husband will probably be able to eat it since it is fairly healthy (he had heart surgery). While the original recipe called for beef, I made it once with ground turkey and once with ground chicken and both were wonderful.

I'm looking forward to the little bit extra that won't fit in the pan that I will put in a little loaf pan for myself (he he he).


Winter Squash-Black Bean Bake with Meat
Inspired by Better Homes and Gardens

1 lb. ground turkey or chicken
3 cups of 1/2-inch pieces peeled butternut squash
1 medium sweet onion, chopped
1 15-oz. can black beans, rinsed and drained
1 cup whole kernel corn (I used canned)
1 4-oz. can diced green chiles
1/2 tsp. salt
1/4 tsp. freshly ground black pepper
1 tsp chili powder
1-1/2 tsp chipotle powder
a dash cayanne
1 cup lower-sodium beef broth
1 3-oz. pkg. cream cheese, softened
1 8-1/2-oz. pkg. corn muffin mix (the Jiffy mix is 8 1/2 ounces)
1 egg, lightly beaten
1/3 cup milk (I use 2%)
1/3 cup canned pumpkin


Preheat the oven to 400 degrees.

In your biggest skillet, sautee the squash and onion with the salt and pepper until the onion is tender and golden and the squash is close to a point where it could be eaten - sort of like it's aldente.

In a separate pan, cook the meat. I find it helpful to cook it in a little bit of water. It breaks apart easier. Drain off the liquid and fat.

Add the meat to the veggies. With it, add the broth, beans, corn, green chiles, and the spices. Heat it all through and then Transfer mixture to 2-1/2-quart baking dish.

In medium bowl stir together the corn muffin mix, cream cheese, egg, milk, and pumpkin puree until just combined. Spoon over beef mixture.

Bake the casserole for 20 minutes or until toothpick inserted into topper comes out clean.


Winter Squash- Black Bean Bake with Meat

Watch out! This casserole is dangerous . . . . Dangerously irresistible, that is ...

See Winter Squash- Black Bean Bake with Meat on Key Ingredient.

Tuesday, December 15, 2009

Easy Pumpkin Tiramisu


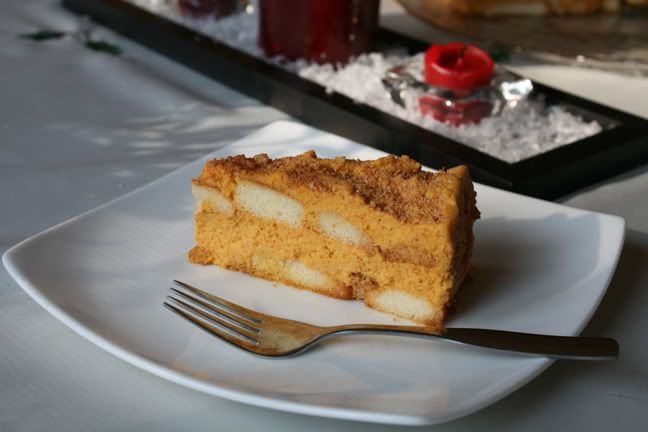
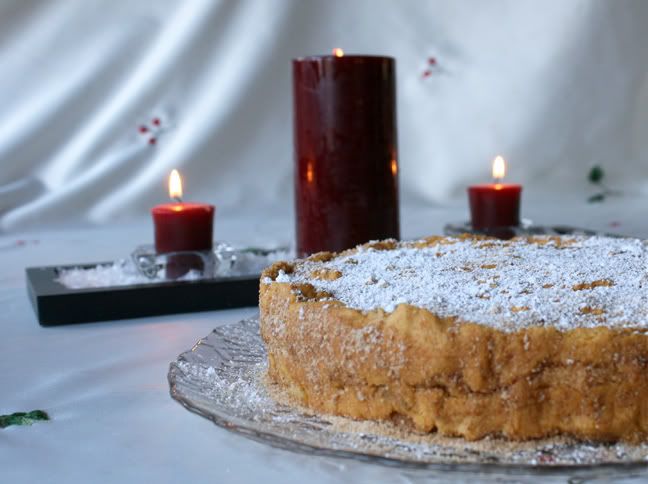
This pumpkin tiramisu was an absolute success, and yet it was so easy to make! My friends were visually impressed and quite happy when it made its way to their plates and then into their mouths. Even several days later, when I brought the last piece, which I saved and guarded with my life, to my friend in CT the night of her holiday party, it was still working it's magic. Linda scoffed it down instead of going for any of the desserts on her table, and raved over it.

In short, you should make this!

It was so easy to make, I made it one-handed. As my life is always full of drama, I broke my wrist in two places the weekend before Thanksgiving. So between my one good hand and my KitchenAid mixer, I was still able to make this. Typing up the blog post was another story - it got delayed until now.

As for the ingredients, let me just write about a couple of them. First, the ladyfingers. I guess the ladyfingers that are traditionally used in tiramisu are somewhat crunchy. So, if you are like me, you won't find crunchy ladyfingers at your grocery store. I only had the soft ones available to me - the kind you put in a trifle. To remedy this, you will have to toast them in the oven. I put them in the oven at 350 degrees for 7 minutes.

The other ingredient I want to mention is the amaretti cookies. I've seen them at Ocean State Job Lot. I got them at a specialty market because I was there and so were they. But if you can't find them, I saw reviewers of the original recipe write that they used ginger snaps. Amaretti cookies are great. And I totally loved eating the leftovers. But hey, if you can't get them, you can't. I would imagine that ginger snaps would be an awesome replacement.

Ooh, there's one more thing I want to mention. Don't skimp on the rum! By the time you eat it, it won't taste too boozy. In fact, I felt it added an essential flavor. When I used it, I used a small nip bottle and covered most of the opening with my thumb as I splashed drips onto the ladyfingers as evenly as possible. The rum was really a wonderful flavor when we dug into this tiramisu.

Do make this the day before you plan to serve it. And then use some self-control. It will be totally worth it!


Pumpkin Tiramisu
Bon Appétit

1 2/3 cups chilled whipping cream
3/4 cup powdered sugar
1 (8-ounce) container mascarpone cheese
1 (15-ounce) can pure pumpkin
1 1/2 teaspoon pumpkin pie spice *
2 (3-ounce) packages halved ladyfingers - crisped
1/4 cup dark rum (or regular if that's what you've got)
2 ounces crushed amaretti cookies (if you can't get them use ginger snaps)
Powdered Sugar

* No pumpkin pie spice? No problem! Just mix 2 tablespoons each of cinnamon and ground ginger with 1 tablespoon ground nutmeg and 1 tsp ground allspice.


Beat the whipping cream and sugar until peaks form. I beat it till stiff peaks formed, but I recommend that you don't. Aim for softer peaks. Then add the mascarpone cheese, pumpkin, and pumpkin pie spice. Mix it until it's smooth and all the ingredients are well-blended.

Line the bottom of a 9-inch-diameter spring form pan with parchment paper. It might be good to make the parchment paper a little too wide. That way, when you put the finished tiramisu on a serving plate, you can slide it off the bottom of the pan, while someone tilts the metal disk toward you. Also, put parchment paper around the sides of the pan.


Crisp your ladyfingers in the oven if they are soft. I put my oven at 350 degrees and put the ladyfingers in for 7 minutes.

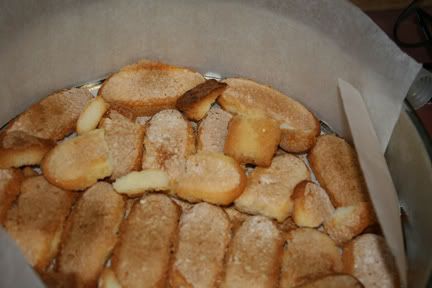
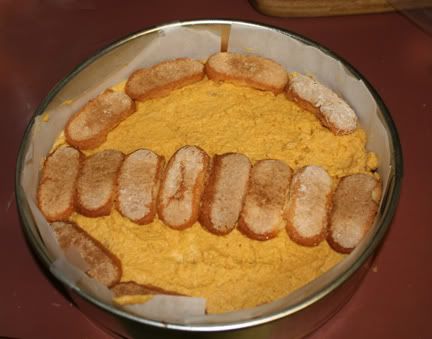
Spread out an even layer of ladyfingers to cover the bottom.even with 2 3/4-inch-high sides with 1 package ladyfingers, overlapping and crowding to fit. I regret that mine looked so messy. Were I to do it again, I would make this bottom row much neater, more like the 2nd row of ladyfingers looks (you will see that photo soon).


Sprinkle the ladyfingers with approximately 2 tablespoons of rum. Then, spread almost half of the leftover filling over ladyfingers. What I'm getting at is that if it's possible, it would be great if you can save some of the filling to spread it on the sides once you put the entire tiramisu on a plate.

Repeat with second package ladyfingers. Doesn't it look so much neater?


Sprinkle the new layer of ladyfingers with the remaining 2 rum. Top with much of the remaining filling (trying to save some for the sides) and smooth it on the top. A little trick you can use if the smoothing isn't going so well is to spray the bottom of you plastic spatula or spoon with cooking oil spray. That will keep the filling from sticking to it, allowing your top to be smoother.

Note: I didn't save any filling for the sides. You may notice that in my photos. That's why I recommend that you do. It doesn't need to be a lot. Most of the sides will have filling already. I'm recommending that you reserve maybe 1/2 cup.


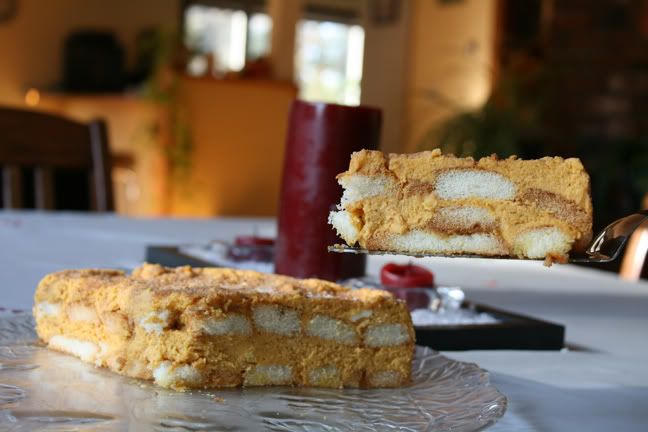
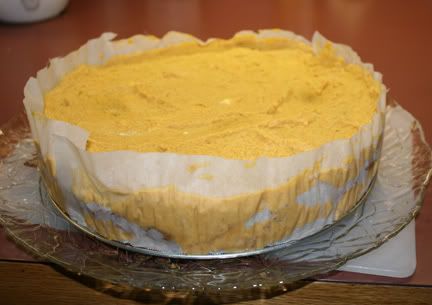
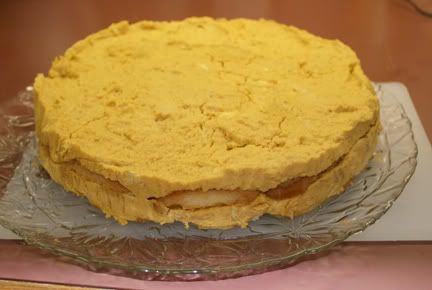
The next day, put the spring form on a serving plate and release the sides of the pan and remove. In this photo below, you can see how I over-whipped my whipped cream. The top layer of mine was very thick. That's why I'm recommending soft peaks.


My husband helped me here to tilt the serving plate, while I lifted the tiramisu with a spatula and carefully grasped the parchment paper underneath it and took the entire tiramisu off of the bottom of the spring form and the parchment. Now my tiramisu was directly on the glass plate. It would have been even easier if the bottom layer of parchment was a little bigger than the pan - even if only in one area.

In this next picture, you can see where I wish I had that leftover 1/2 cup filling:


Grind up the amaretti in a food processor or crush it in a bag. Decorate the top with it. Perhaps even the sides. I put some on the sides to cover up flaws.

I sprinkled with powdered sugar just before serving.


pumpkin tiramisu

This pumpkin tiramisu was an absolute success, and yet it ...

See pumpkin tiramisu on Key Ingredient.