Friday, December 18, 2009

Winter Squash- Black Bean Bake with Meat


Watch out! This casserole is dangerous . . . . Dangerously irresistible, that is! I've made it twice in the span of a week, and I'm about to make it a 3rd time.

The first time, Joe and I ate it. And we did a good job of it. It was mostly gone the first night. Definitely gone the next day.

I made it yesterday to give to a friend, but as I was finishing the meat part of it, Joe called and said he needed a dish for his office Christmas party the next day. So since it was already made, he got that batch and I'm about to make it a third time for my friend whose husband is in the hospital. I figure she doesn't want to cook right now, and she will enjoy and appreciate some healthy and delicious home cooking. And her husband will probably be able to eat it since it is fairly healthy (he had heart surgery). While the original recipe called for beef, I made it once with ground turkey and once with ground chicken and both were wonderful.

I'm looking forward to the little bit extra that won't fit in the pan that I will put in a little loaf pan for myself (he he he).


Winter Squash-Black Bean Bake with Meat
Inspired by Better Homes and Gardens

1 lb. ground turkey or chicken
3 cups of 1/2-inch pieces peeled butternut squash
1 medium sweet onion, chopped
1 15-oz. can black beans, rinsed and drained
1 cup whole kernel corn (I used canned)
1 4-oz. can diced green chiles
1/2 tsp. salt
1/4 tsp. freshly ground black pepper
1 tsp chili powder
1-1/2 tsp chipotle powder
a dash cayanne
1 cup lower-sodium beef broth
1 3-oz. pkg. cream cheese, softened
1 8-1/2-oz. pkg. corn muffin mix (the Jiffy mix is 8 1/2 ounces)
1 egg, lightly beaten
1/3 cup milk (I use 2%)
1/3 cup canned pumpkin


Preheat the oven to 400 degrees.

In your biggest skillet, sautee the squash and onion with the salt and pepper until the onion is tender and golden and the squash is close to a point where it could be eaten - sort of like it's aldente.

In a separate pan, cook the meat. I find it helpful to cook it in a little bit of water. It breaks apart easier. Drain off the liquid and fat.

Add the meat to the veggies. With it, add the broth, beans, corn, green chiles, and the spices. Heat it all through and then Transfer mixture to 2-1/2-quart baking dish.

In medium bowl stir together the corn muffin mix, cream cheese, egg, milk, and pumpkin puree until just combined. Spoon over beef mixture.

Bake the casserole for 20 minutes or until toothpick inserted into topper comes out clean.


Winter Squash- Black Bean Bake with Meat

Watch out! This casserole is dangerous . . . . Dangerously irresistible, that is ...

See Winter Squash- Black Bean Bake with Meat on Key Ingredient.

Tuesday, December 15, 2009

Easy Pumpkin Tiramisu


This pumpkin tiramisu was an absolute success, and yet it was so easy to make! My friends were visually impressed and quite happy when it made its way to their plates and then into their mouths. Even several days later, when I brought the last piece, which I saved and guarded with my life, to my friend in CT the night of her holiday party, it was still working it's magic. Linda scoffed it down instead of going for any of the desserts on her table, and raved over it.

In short, you should make this!

It was so easy to make, I made it one-handed. As my life is always full of drama, I broke my wrist in two places the weekend before Thanksgiving. So between my one good hand and my KitchenAid mixer, I was still able to make this. Typing up the blog post was another story - it got delayed until now.

As for the ingredients, let me just write about a couple of them. First, the ladyfingers. I guess the ladyfingers that are traditionally used in tiramisu are somewhat crunchy. So, if you are like me, you won't find crunchy ladyfingers at your grocery store. I only had the soft ones available to me - the kind you put in a trifle. To remedy this, you will have to toast them in the oven. I put them in the oven at 350 degrees for 7 minutes.

The other ingredient I want to mention is the amaretti cookies. I've seen them at Ocean State Job Lot. I got them at a specialty market because I was there and so were they. But if you can't find them, I saw reviewers of the original recipe write that they used ginger snaps. Amaretti cookies are great. And I totally loved eating the leftovers. But hey, if you can't get them, you can't. I would imagine that ginger snaps would be an awesome replacement.

Ooh, there's one more thing I want to mention. Don't skimp on the rum! By the time you eat it, it won't taste too boozy. In fact, I felt it added an essential flavor. When I used it, I used a small nip bottle and covered most of the opening with my thumb as I splashed drips onto the ladyfingers as evenly as possible. The rum was really a wonderful flavor when we dug into this tiramisu.

Do make this the day before you plan to serve it. And then use some self-control. It will be totally worth it!


Pumpkin Tiramisu
Bon Appétit

1 2/3 cups chilled whipping cream
3/4 cup powdered sugar
1 (8-ounce) container mascarpone cheese
1 (15-ounce) can pure pumpkin
1 1/2 teaspoon pumpkin pie spice *
2 (3-ounce) packages halved ladyfingers - crisped
1/4 cup dark rum (or regular if that's what you've got)
2 ounces crushed amaretti cookies (if you can't get them use ginger snaps)
Powdered Sugar

* No pumpkin pie spice? No problem! Just mix 2 tablespoons each of cinnamon and ground ginger with 1 tablespoon ground nutmeg and 1 tsp ground allspice.


Beat the whipping cream and sugar until peaks form. I beat it till stiff peaks formed, but I recommend that you don't. Aim for softer peaks. Then add the mascarpone cheese, pumpkin, and pumpkin pie spice. Mix it until it's smooth and all the ingredients are well-blended.

Line the bottom of a 9-inch-diameter spring form pan with parchment paper. It might be good to make the parchment paper a little too wide. That way, when you put the finished tiramisu on a serving plate, you can slide it off the bottom of the pan, while someone tilts the metal disk toward you. Also, put parchment paper around the sides of the pan.


Crisp your ladyfingers in the oven if they are soft. I put my oven at 350 degrees and put the ladyfingers in for 7 minutes.

Spread out an even layer of ladyfingers to cover the bottom.even with 2 3/4-inch-high sides with 1 package ladyfingers, overlapping and crowding to fit. I regret that mine looked so messy. Were I to do it again, I would make this bottom row much neater, more like the 2nd row of ladyfingers looks (you will see that photo soon).


Sprinkle the ladyfingers with approximately 2 tablespoons of rum. Then, spread almost half of the leftover filling over ladyfingers. What I'm getting at is that if it's possible, it would be great if you can save some of the filling to spread it on the sides once you put the entire tiramisu on a plate.

Repeat with second package ladyfingers. Doesn't it look so much neater?


Sprinkle the new layer of ladyfingers with the remaining 2 rum. Top with much of the remaining filling (trying to save some for the sides) and smooth it on the top. A little trick you can use if the smoothing isn't going so well is to spray the bottom of you plastic spatula or spoon with cooking oil spray. That will keep the filling from sticking to it, allowing your top to be smoother.

Note: I didn't save any filling for the sides. You may notice that in my photos. That's why I recommend that you do. It doesn't need to be a lot. Most of the sides will have filling already. I'm recommending that you reserve maybe 1/2 cup.


The next day, put the spring form on a serving plate and release the sides of the pan and remove. In this photo below, you can see how I over-whipped my whipped cream. The top layer of mine was very thick. That's why I'm recommending soft peaks.


My husband helped me here to tilt the serving plate, while I lifted the tiramisu with a spatula and carefully grasped the parchment paper underneath it and took the entire tiramisu off of the bottom of the spring form and the parchment. Now my tiramisu was directly on the glass plate. It would have been even easier if the bottom layer of parchment was a little bigger than the pan - even if only in one area.

In this next picture, you can see where I wish I had that leftover 1/2 cup filling:


Grind up the amaretti in a food processor or crush it in a bag. Decorate the top with it. Perhaps even the sides. I put some on the sides to cover up flaws.

I sprinkled with powdered sugar just before serving.


pumpkin tiramisu

This pumpkin tiramisu was an absolute success, and yet it ...

See pumpkin tiramisu on Key Ingredient.

Wednesday, November 4, 2009

Red Lentil and Butternut Squash Soup

red lentil and butternut squash soup

Before I get to the food, let me address this important issue. Where have I been?

Well, I've been very, very busy getting a certificate in Web Design - the first step in a hopeful career change. So I've been crazy in over my head as I learned all about css, page design, flash, using available java scripts, jQuery, a bit about XML, and table-driven and css-driven DHTML.

I haven't cooked much beyond boxed pizza in months. The freezer has been full of frozen meals and I've been thrilled about the invention of the microwave. We didn't have those things when I was a little kid!

But on to the food!

This recipe happened by mistake, as I got punished by my bad karma.

Several weeks ago while out taking
fall pics, I stopped in at one of my favorite foodie destinations, Idylwilde Farms. I saw the soup mixes on the shelves and couldn't resist. You know, the dry soup mixes - the ones with the dried beans in a clear cellophane bag, and then at the top are the herbs and such. You add some stock and veggies. Here's a pic of one of the mixes I got:

soup mix

Well, I bought about four of them because I thought it would be like homemade goodness, but with convenience. Also, they make rather large batches, I could do it in a crock pot and freeze individual meal-sizes that I could just reheat when I felt like it and have comfort food any time.

The first one I made was the beef stew pictured above. And it was delicious. But as I made it I felt like an idiot. I spent so much time sauteing the onions and peeling and cutting up yellow turnip. I thought to myself, "Meryl, what you are doing now is the time consuming part of making anything. You could have made your own stew and made this a blog post and been proud of your creation instead." But it was too late for that.

So a couple of days ago I figured I'd use another of the mixes - this time the Red Lentil and Butternut Squash soup mix. But I got bitten in the rear by bad karma!

So, I was kicking myself as I cut up and seared some chicken, sliced and sauteed the onion, and cubed the butternut squash. But I thought that I must not let this soup mix go to waste. And I was sure it would taste good.

I put all the chicken broth (low sodium) in the crock pot. I added the chicken and veggies, and opened up the top of the cellophane bag of soup mix. The herb packet is always at the top. I reached in, took it out, and I immediately noticed that things were hanging off of it, as if caught on a web.

I was holding it over the sink, puzzled. I thought to myself, "what is this?" as I removed it all from the little plastic herb packet. It was then that I saw the live little worms twitching around inside.

Ewwwwwwwwwwwwwwwww!

And now I've got a dilemma because the soup is already started! I had to do something right away! I remembered that I had some red lentils, so I ran to my laptop to look for my own recipe.


I began by typing in epicurioius.com to find out that my Internet went down. OMG, the Gods are totally against me today! I thought to myself, "Meryl, don't panic. Take a walk with the dogs and the Internet will be back up and running when you return."

So I did. And when I came home, the Internet was back up. I looked at various recipes on various sites and came up with a game plan. Then, I ran to the cupboards to get the lentils. CRAP! I no longer had any.

I decided to let the what was in the crock pot cook, since the chicken was in it, for the rest of the afternoon. Then I put the entire crock in the fridge that evening and went to the store, not knowing if I'd find the red lentils easily or not. Luckily I did find them and I got back to the soup the next day.

In the end, the recipe I chose was a success. Warm, cozy, seasonal, and tasty. I'm glad that I made it and not the mix, although I could have done without the roller coaster ride.

Red Lentil and Butternut Squash Soup
(a crock pot recipe that makes 8-10 servings)

10 cups broth (I use low sodium - by the way, how big is your crock pot?)
a bag of frozen chicken breasts – and olive oil (large bag - approx 8-9 breasts / 3lb?)
a bunch of scallions

olive oil
1 onion sliced
1/2 can light coconut milk *
1 tbs garam masala ** (mine was old)
1 tsp red madras curry
1 tsp cumin
2 cups red lentils (added in last - cooked for about 2-3 hours, tasting for doneness)
salt (I added 1 tsp - I'm very sensitive to salt. I'd suggest 3 tsp for normal people)


* The coconut milk was great. If I were to remake, I'd add the whole can.
** My garam masala was quite old. But even if it were fresh I would still try the entire tablespoon. I bet it would be awesome. But if you are wary of that, you could go with 1.5 teaspoons.

Okay, if I were making this today, all in one day, this is what I would do.

Put the crock pot on high and add the broth, the coconut milk, the cut up butternut squash, and the spices.

Cut up the chicken in to small pieces or slices. Sautee them and them in 1-2 tablespoons of olive oil and add them into the crock pot.

Back in the sautee pan, turn the flame on medium-high, add 1-2 tablespoons of olive oil, heat it up, and add the sliced onions. Sautee them till golden brown and then add them to the crock pot. Leave the crock pot on high for 1/2 hour to an hour. Then turn it to low for a good long time. Geeze, this is where I had it on low for about 6-8 hours and then put it in the fridge overnight.

The lentils don't need as long to cook. Red lentils will take between 1-2 hours to soften on low.

Then you have a delicious, hearty, comforting fall soup. If you put it in the fridge, you'll probably need to add more broth, it gets very thick overnight, and the crock pot can only hold so much liquid.

spoonful


Red Lentil and Butternut Squash Soup

A comforting, hearty, fall soup.

See Red Lentil and Butternut Squash Soup on Key Ingredient.

Thursday, August 27, 2009

Blueberry Pie


This pie rocks! It was the best blueberry pie I've ever had! I'm super proud to have made it!

That's pretty impressive since I almost never have the opportunity to make a pie. It's been years since I've made a pie, and I've never made a blueberry one. So I'm patting myself on the back and saying "good girl, Meryl."

Why, do you ask, do I never get to make pies? To begin, it's just Joe and I (and the dogs), and we struggle with weight issues. So the last thing we need around here is an entire pie sitting on the counter top. And during all the holidays when people make pies, all the pies are spoken for by other members of the family. The one or two times that I tried to add to the repertoire of pies, my pies were practically untouched, so I gave up. Perhaps I lost my pie-baking confidence as well. So, I just don't make them.

I bought this Longaberger pie plate from my friend Karen about 4 years ago, and up until last Sunday, I hadn't used it yet:


But last Sunday we were invited to a friend's for brunch. She was going to make a peach pie for dessert, and that was very nice of her! But knowing that Joe wouldn't have touched it with a 10-foot pole, I offered to make a blueberry pie (blueberry is Joe's favorite pie).


She accepted, and I thought to myself that I had gotten into a conundrum. I would have to live up to Joe's idea of a blueberry pie, and that idea was his mom's blueberry pie. Oy vey! That's a lot to live up to.

I found a well-liked recipe for a pie on Epicurious.com. Well, the filling was well-liked and the crust was not. Many of the reviewers only suggested to double the cornstarch, so I did. I accidentally omitted the butter when I made my pie, but it wasn't missed.

The crust I used came from my friend Karen. I've posted her recipe as well.

If you are looking for a great blueberry pie, look no further! This is the one.


Blueberry Pie
Filling inspired by a Gourmet Magazine recipe

6 cups blueberries, picked over
1/2 cup cornstarch
1 cup sugar
2 tablespoons fresh lemon juice
1/2 teaspoon freshly grated nutmeg
1/2 teaspoon salt
2 tablespoons half-and-half or milk (optional - to top the crust)
turbinado sugar or large-grain cane sugar (to top the crust)

Karen's No-Fail Flaky Pie Crust


Preheat the oven to 425°F.


In a large bowl toss together the blueberries, the cornstarch, sugar, lemon juice, nutmeg, and the salt. It might be easiest to use your hands so you don't crush all the blueberries. Mound the filling in the shell.

If you use the butter, place little pieces of it around on the top.

Place the top crust over it and crimp the edges.


Be sure to use a knife and make air vents in the top crust. I made a smiley face with some outer slashes like short rays of sunshine. Next time I do it, I will remove slivers in the smiley face.

Bake the pie in the bottom third of the oven at 425 for the first 20 minutes. Then reduce the heat to 375 (leaving the pie where it is) and bake for another 25-35 minutes. I baked mine 30 minutes and wish I had taken it out a few minutes sooner. But it was acceptable nonetheless.


Wednesday, August 26, 2009

Karen's No-Fail Flaky Pie Crust

I'm not accustomed to making pies, so when I needed to make one and I found myself visiting my friend Karen, I asked her if she had a no-fail, flaky pie crust recipe. I had a feeling she did, and I was right!

I thank you Karen for this wonderful crust recipe. It was perfect! So easy and simple, that even a pie buffoon like myself could use it and impress her friends.

Karen doesn't even roll out this pie crust. She puts it in the pie pan and spreads it out to fit it with her hands. But in the few times I've made crusts in my life, I've had problems, so I put the chilled dough between sheets of wax paper and rolled them out. It worked like a charm. I only wish I had a little more on the bottom crust. It didn't look too thick, but maybe I could have rolled it out a bit more to have more to play with on the outer edge.


Karen's No-Fail, Flaky Pie Crust
makes a double crust for a 9" pie

2 cups flour
1 1/2 teaspoons sugar
1 teaspoon salt (I used more like 2/3)
1 egg
1 tablespoon vinegar
1/4 cup water
3/4 cup shortening

Mix the dry ingredients in a bowl.

Cut in the shortening. I used this tool pictured.

In a separate bowl, beat the egg, vinegar, and water.

Mix in the dry ingredients.

Use your hands to form it all into a ball.

Split the ball in two. One ball should be larger for the bottom crust.

Wrap them in plastic wrap and chill for at least two hours.

When it is time to make the pie, roll out the dough balls between sheets of wax paper.

I learned a little trick to get the dough from the counter to the pie pan when I was watching Sara Moulton the Food Network a long time ago. Fold the dough over in half once, and then again in the other direction. Then place it in the pie pan and unfold. It's much easier than trying to lift the thin sheet of dough.

Karen freezes hers sometimes so she has it ready-made for later.

I used this crust to make my Blueberry Pie.

Tuesday, August 25, 2009

Costa Rican Beet Salad


I love beets. I cannot say the same for my husband, but I can say the same for my friends, Phyllis, Jennifer, and Scott. So I took advantage of spending time with them on Sunday to make some beets.

This Costa Rican Beet Salad is the best I can do to re-live a fond food memory. I studied at the University of Costa Rica in San José for a semester and they served a beet salad that I loved on campus there. That beet salad was near and dear to my heart.

I'm sad that I forgot to save a sprig of the beautiful cilantro for the picture and I had to use a sprig of flat leaf parsley. It was better than nothing. But know, that the cilantro was a wonderful flavor in this dish.

Also, there really are few ingredients. That’s great, because I was originally going to make a salad that had many ingredients and would have cost a bundle. Like many of you, I recently lost my job, so I have to be careful about how much I’m spending.

This salad may have served four, but not if those four wanted large portions. I had more beets because I was originally going to make two different beet salads, but decided to double this one when I realized how little salad I had when I was done.

This recipe will be in the regular recipe rotation around here. It was scrumptious and easy. And who doesn’t like an easy recipe!

Oh, in the picture, I was sad to have to use a sprig of parsley for decoration on the beet salad. I had forgotten to save a sprig of cilantro. Cilantro was an important flavor in the salad. I was gentle with the cilantro - Phyllis liked that it was on the subtle side. But the salad wouldn't be the same without it.


Costa Rican Beet Salad

Inspired by a recipe posted on Recipezaar.com by Cheerleader

4 medium fresh beets
1/4 sweet yellow onion, minced (I used vadalia)
1/3 large yellow pepper, finely diced
2-3 Tablespoons chopped cilantro
4 tablespoons mayonnaise
salt to taste (if you must – truth is, I didn’t)

Prepare the beets and remove the skins.

Dice the beets into small squares

Add minced onion, cilantro, and sweet pepper. This is what I had before I added the mayonnaise:


Add mayonnaise and gently mix thoroughly.

Add the salt if you use it.

Preparing and Cooking Beets - The Boiling Method

Beets are easy to work with and there are several ways to prepare them. In the cold weather it's nice to put them in foil packs with the skins on, baked them, and then removed the skins when done. In the summer, I choose the boiling method.

When choosing your beets at the grocery store, try to get a bunch that has beets of approximately the same size. By doing this, you will have beets that finish cooking at the same time. If they aren’t the same size, be aware that the smaller ones will finish cooking sooner. You will need to remove them earlier so you don’t have beet mush!

Preparing the Beets

Cut off the greens at the base of the beets.

Cut off the tail of the beet.

Leave the skin on the beets! This is very important!

Boil the water first and then place the beets in it. I started out with a 30 minute time limit with the pot covered. Check the beets by piercing them (or attempting to pierce them) with a fork or knife. When the fork or knife easily pierces the beet and goes toward the middle, coming out with no effort, the beets are done!
Beets shouldn't be cooked al dente.

When I checked at the 30 minute mark, I knew that at least another 30 minutes would be necessary. I had chosen large beets at the store.

Thirty minutes later, I set the timer for 10 more minutes. At that point, my two smaller beets were done. I removed them and ran cold water over them while I removed the skins. By the time I was done with that, a few more of the beets were done, and so on and so on.

Important Note About Skin Removal

If you want to place the beets in a bowl of cold water before handling them, do it with the skins on!

Case in point – I removed the skins of the first two small beets and then cut them in half and put them in cold water. I forgot to do it with the next beets, and I’m so glad! Look at the difference in the color of the beets I cut in half and then placed in cold water without skin compared to the beets that I place in cold water with the skin on and in tact before removing the skin:


Removing the skin is easy when the beets are cooked. I took the picture below without the water running just so you could see that all it takes is a little pressure with your thumb and pulling away. The skin will go with it. Easy-peasy! Even easier under running water.


Now you are ready for any beet recipe, such as Costa Rican Beet Salad, or to just eat them as they are.

Sunday, March 29, 2009

Bourbon-Maple Scallops


This recipe came from a failed cedar-planked salmon experiment I had last week. The marinade was originally for grilled salmon on a cedar plank.

I liked the combination of flavors in the marinade, so I decided to try it with scallops. First, I tried it on a wood plank. I really disliked the taste of the wood planks. Maybe it was the type of wood I had. I was surprised because I've had wood-grilled scallops before, and I've liked them.

Next, I made the scallops without the wood planks. That's much better! The scallops are sweet and tender. The syrup and the bourbon combine and create pure deliciousness with the scallops. This recipe gets a big thumbs-up!


Bourbon-Maple Scallops

1 pound of fresh sea scallops
1/4 cup Bourbon
1/4 cup grade B maple syrup
2 Tbs olive oil
salt
pepper

Lightly score the tops and bottoms of the scallops with a crosshatch pattern (a slanted tic-tac-toe board). Only let the knife go through the surface slightly.

Whisk the liquids and seasonings together. Add the scallops and let them marinate in the liquid for 15-30 minutes. Saute on a medium-high flame for 2-3 minute per side. Try to only turn over once.

Drizzle the pan juices over the top and serve.


<

Sunday, March 15, 2009

Chicken And Dumplings


Chicken and Dumplings is a truly comforting dish that I have been craving for some time now. After an unfortunate first try, I have now satisfied myself with the help of Simply Recipes. This recipe, while a bit time consuming, wasn't difficult to make. And even better, it ended up being very popular at a pot-luck lunch where I got several requests for the recipe. I am now very happy to share it with you.

Why was my first try at Chicken and Dumplings such a flop? Well, in reflecting on the experience, it probably wasn't a good idea to poach the chicken for a long period of time to make the stock. Also not a good idea was putting in the vegetables early in the process.

This time, I seared the chicken and only poached it for a short time afterward. The vegetables didn't go in early. I put them in toward and finished the recipe with the dumping topping as soon as they reached the correct level of doneness. The dumplings are the final step, and they cook very quickly. With this cooking process I got much better results!

I spent time finding just the right recipe that I would adapt to my tastes. In my Chicken and Dumpling research, I learned that there are two versions of the dish: a southern version and a northern one. I do prefer the northern version.

The biggest difference in the two versions has to do with the preparation of the dumplings. In the northern version, the dumplings are dropped into the stew and cooked while the pot is covered. The dough for the dumplings is just barely mixed, and the dumplings end up light and tender. In the southern version you make the dumplings by rolling out a dough and cutting it. You cook them for a longer period of time in the stew and they end up being much more dense.

So here it is, a delicious, crowd-pleasing, northern-style chicken and dumpling recipe.


Chicken & Dumplings
Adapted from Simply Recipes


For the Stock
5-6 lbs chicken parts (breasts, drumsticks, thighs, with bones), skin removed
1 Tbsp olive oil
1 medium onion, diced
2 bay leaves
1/2 teaspoon salt
1/2 teaspoon freshly ground pepper
salt and pepper for seasoning the chicken and onions (to taste)
6 cups hot water


For the Stew
3 celery stalks, trimmed and cut into 1/3-inch pieces
4 medium carrots, peeled and cut into 1/2-inch pieces
6 boiling onions (approximately 1" in diameter), peeled, halved, & sliced
6 Tbsp unsalted butter
6 Tbsp all-purpose flour
1 teaspoon dried thyme
2 tablespoons dry sherry or vermouth
1 tablespoons heavy cream (optional)
1 cup frozen green beans, thawed
1/4 cup minced fresh parsley leaves
Ground black pepper


For the Dumplings
2 cups flour
2 teaspoons baking powder
1/2 teaspoon salt
1/4 cup minced fresh herb leaves such as parsley, chives, and tarragon (optional)

2 tablespoons butter, melted
1 1/2 cup milk


In a large dutch oven heated to medium-high, add a tablespoon of oil and saute the onions with salt and pepper to taste. Remove from the pot and set aside.

In the same dutch oven, add another tablespoon of oil and brown the chicken on all sides. Reduce the heat to low. Cover and cook an additional 15-20 minutes. Return the onion to the pot and add the water. Increase the heat to medium high.


Add the bay leaves, 1/2 teaspoon salt and simmer, partially covered, for 20 minutes. By the end, the chicken should be cooked through. At this point, remove the chicken pieces so they can cool. Strain the broth and discard the solids. Reserve five cups of the stock for making the roux.

Add the chicken and the unreserved stock back into the pot along with the carrots and cook three minutes. Then add the celery green beans, and parsley. Cook for an additional five minutes.

While the chicken and vegetables cook in the stock, you can make the roux which will thicken the stock and turn it into a light sauce.

To make the roux, melt the butter in a large pan. Whisk in the flour and continue whisking for one to two minutes. The roux will turn light golden brown. As you whisk, pour in the sherry or vermouth and continue whisking! Slowly add the reserved five cups of stock while still whisking. You should now have a lovely gravy such as mine:


Add the gravy and the heavy cream to the pot. Salt and pepper to taste.

Doesn't it look so wonderful? At this point, you are almost done!


The dumplings will come together very quickly. Begin making them now by sifting together the flour, baking powder, and salt. Mix in the fresh herbs. Finally, add the melted butter and the milk. Use a large fork to combine the liquids and dry ingredients only until the dry ingredients are just moistened.

Uncover the pot and drop the dumplings by the heaping tablespoon onto the top of the stew. Cover and simmer for 15 minutes. No peeking!

Because I made this dish for a pot luck, I wanted extra dumplings. So at this point, I mixed the dumplings into the stew, added even more stock (this time the stock came from a box), made a second batch of the batter, and added the new dumplings to the top of the stew, cooking for another 30 minutes.

This dish is best if served immediately, but it was fine next day when I served it (reheated in a crock pot).

Chicken and Dumplings

Chicken and Dumplings is a truly comforting dish that I ...

See Chicken and Dumplings on Key Ingredient.

Wednesday, February 25, 2009

Mussels in White Wine


It's hard to take a good picture of mussels in a bowl. I don't think that the picture above does this dish justice. Because I'm going to make a serious proclamation: These are some of the best mussels I've ever eaten! And I'm the cook! I'm so proud.

And not only are these mussels incredibly tasty, but they are incredibly easy to prepare - and the dish comes together really fast too!

Mussels feel fancy to me, yet they are so much less expensive than other seafood items in the store. I got a 3 1/2 lb. bag of them for just over $3.00. I can appreciate that, can't we all? In comparison, I keep wanting to buy scallops, but I just can't justify spending the money on them lately. They are $13.00 a pound for fresh (not frozen) large scallops - and that's here in new England.

I recommend these mussels to all you shellfish eaters. You can impress yourself and your friends with them. They are great as a side dish, but I could totally see tossing them in pasta. The sauce is really flavorful and so pretty too! When my mussels were done, I would have dipped in crusty bread, but I didn't have any. So I cooked up some rice and had it like this:


Isn't that broth so beautiful! It was delicious. And since making it, I bought some crusty bread to have with the still-leftover broth.

I will definitely, without a doubt, make this mussel dish again!

Mussels in White Wine
Adapted from Barefoot Contessa

Serves 1 as a main dish - 2 as an appetizer

3 pounds cultivated mussels
1/3 cup all-purpose flour
2 tablespoons unsalted butter
2 tablespoons good olive oil
1/2 cup chopped sweet onion
3 cloves garlic, minced
1/2 cup petite diced canned tomatoes, drained
1/2 teaspoon good saffron threads, crumbled
1/2 teaspoon thyme
1 cup good white wine - I used a chardonnay
1/2 teaspoon kosher salt
1 teaspoon freshly ground black pepper

When you open your mussels, you want to remove any that might not be alive. If the shells are closed tightly, you can trust the mussel. If the shell is open, quickly press it together.

It will spring open some, and at that point, a live mussel will close on it's own (sometimes it takes a few seconds). I tend to do this to all the open ones as I sort through the mussels. I put any open to the side. When I'm done sorting, I go back to the ones that were open and see if they closed. Toss any that didn't close!

Sometimes mussels have sand in them. It's not pleasant when you bite into them, so here's how to remove that pesky sand: Fill a large bowl to completely submerge your mussels with a couple of inches of water on top. Sprinkle 1/3 cup flour into the water and mix. Then add the mussels. Leave them in the water (some will float) for 1/2 hour.

Drain the flour water and rinse the mussels. You are likely to see all the sand they spit out as you pour off that water and see the bottom of the bowl. Pull off any beards from the mussels and scrub off any dirt. Now your mussels are ready.

Heat-up the butter and olive oil in a deep stock pot. After about 4 minutes, add the saffron. After 2 more minutes, add the garlic, tomatoes, parsley, thyme, wine, and salt. Bring the mixture to a boil.

Add the mussels and cover the pot. Cook for 8-10 minutes on medium heat. Shake the pot (while it's covered) from time to time so that the juice can get to the ones on top, and so that they don't scorch on the bottom.

You're done now! Enjoy your mussels.

Friday, February 20, 2009

Moroccan-Style Chicken Pie


My latest Bon Appétit magazine has been sitting on my coffee table for a week. I finally opened it today and a few recipes caught my eye. This is one of them.

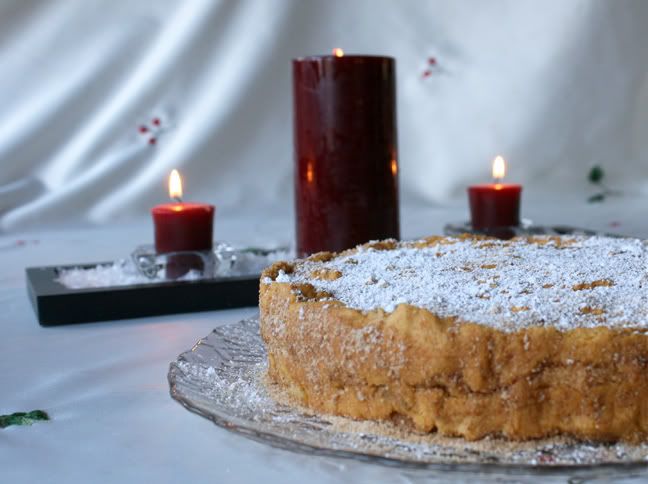
I like this recipe for many reasons! First, the ingredients are readily available. I had almost all of them right here at home. Next, it was an easy recipe to make - no complicated procedures here. Finally, the pie was wonderfully aromatic, flavorful, and satisfying.

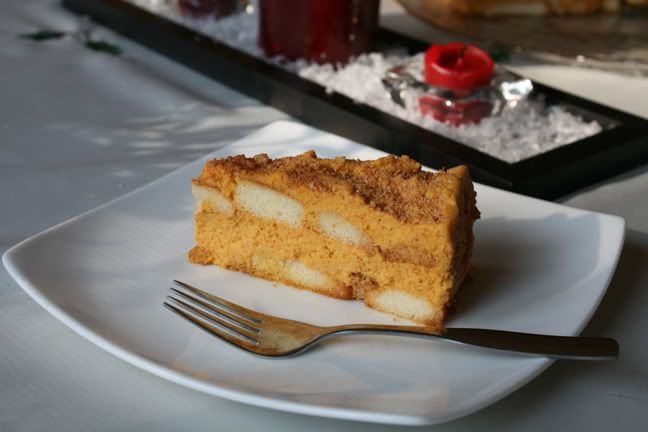
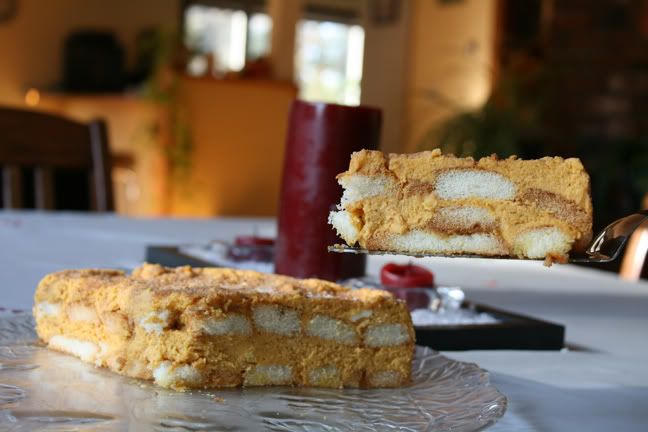
I loved the combination of sweet and savory, too. And the crunchy phyllo topping with nuts and sugar (and salt) between the layers was really nice.
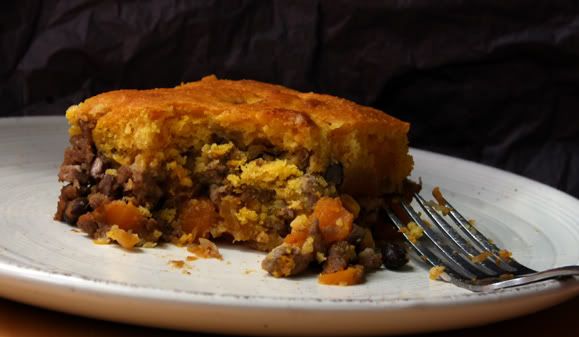
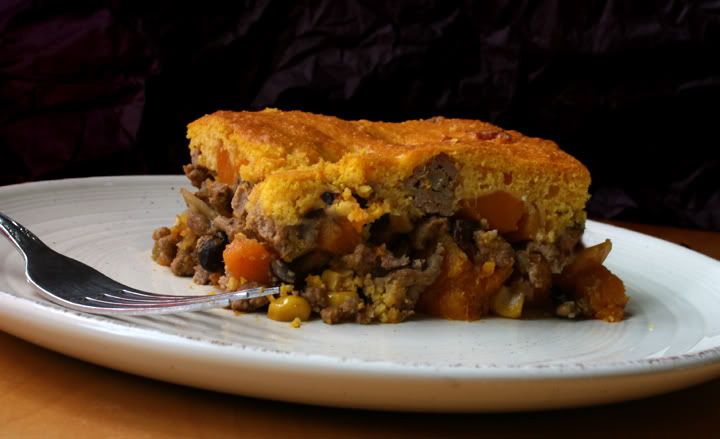
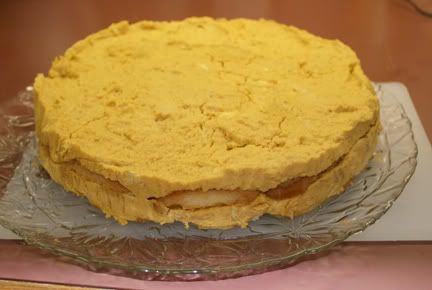
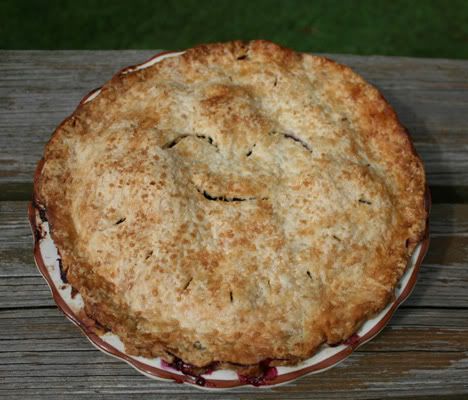
I'm not sure how necessary it was having 6 layers of phyllo on the bottom and 4 on the top. I would switch that around for next time. The other thing I would do differently would be to cut the bottom layers of phyllo the way the recipe recommended (using the bottom of the pie plate), but make the top layers bigger. As you can see below, the top layers weren't quite big enough.

But those are minor little adjustments that I can recommend to you if you try this recipe.
Speaking of the recipe, I really didn't stray much from what was published in Bon Appétit. I used butter flavored cooking spray instead of butter between the bottom 6 layers of phyllo dough. I did use butter between the top layers because they were exposed and I didn't want to risk the texture being wrong. Also, I used granulated sugar for the crust, and skipped the cinnamon (by accident!).

Moroccan-Style Chicken Pie
Slightly Adapted from Bon Appétit

Serves 5-6 people.

Filling Ingredients
2 tablespoons olive oil
1 large sweet onion, chopped
salt and pepper to taste
1 teaspoon ground cinnamon
1 teaspoon ground ginger
1/2 teaspoon turmeric
1/8 teaspoon crumbled saffron threads
2 tablespoons all purpose flour
2 cups low-salt chicken broth (I used home made stock)
1 1/2 pounds skinless boneless chicken thighs
1/4 cup chopped golden raisins
2 tablespoons chopped fresh cilantro
2 tablespoons chopped fresh Italian parsley

Crust Ingredients
1/2 cup slivered almonds
2 tablespoons granulated sugar
1/2 teaspoon salt
10 sheets (about 17x12 inches) fresh phyllo pastry or frozen, thawed
1/4 cup unsalted butter, melted*

* I used less butter because I used cooking oil between the layers for the bottom of the pie. I also went easy on the butter for the layers of the top crust. I don't think you need more than 1/4 cup to prepare the crust with all butter.

To Prepare The Filling
Put a large, heavy pan over medium heat on the stove. Add the oil and the onion. Season the onion with salt and pepper and cook for approximately 10 minutes until the onions are soft and transparent. At that point, sprinkle them with the ginger, cinnamon, tumeric, and saffron. Continue to cook the onions for one minute. Then, sprinkle them with a tablespoon of flour and cook for one more minute.

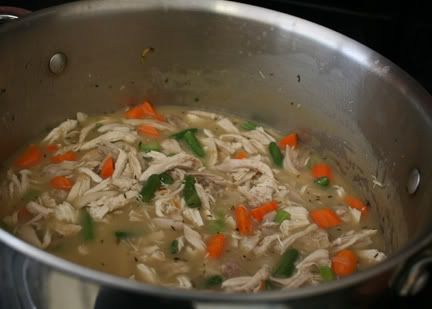
Add the chicken stock to the pan and the chicken thighs. Cook, uncovered, for about 20 minutes so that the thighs are cooked through. Turn them over midway through the cooking time. Here's my chicken when it was done.


Remove the chicken from the pan and add the golden raisins to the sauce. Once the chicken is cool enough, shred it. Then combine the chicken and the sauce and place the mixture in the refrigerator to cool. Here's my finished filling:

It is supposed to cool completely before assembling the pie.

The pie assembly goes very quickly. So turn on your oven to 375 degrees and start preheating.

Prepare The Crust Ingredients
In a small food processor, mix the almonds, sugar, and salt until it is evenly processed and resembles coarse salt.

Cut The Phyllo Dough
Remove 10 sheets of phyllo dough from the package. Put the rest back in the freezer. Split the 10 sheets of phyllo so that you have 5 for the top layer of the pie, and 5 for the bottom. Keep the phyllo covered with a damp (not soaking wet) paper towel or two while you are not using it. Phyllo dries out very quickly, so you want to keep it moist.

Place the 5 layers designated for the bottom of the pie on a working surface. Put the pie pan you are using on top and cut around the bottom edge of the pie pan so that you have 5 phyllo disks that will perfectly fit into your pie pan. Put the disks on a plate and cover them with the damp paper towels.

Place the 5 layers designated for the top of the pie on a working surface. Place the pie pan on top. This time, when you cut through the layers of phyllo, trace the edges of the top of the pie pan, which will give you larger disks for the top of the pie. You want these disks to fit perfectly on top of the pie once it is filled with the chicken mixture. Put the disks on a plate and cover them with the damp paper towels.

To Assemble The Pie
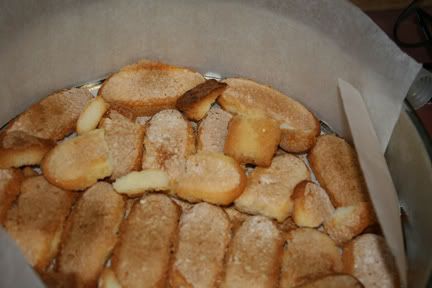
Work with the bottom layers of phyllo first. Remove one sheet of phyllo. Brush butter on it and then top with a sprinkling of the sugar-almond mixture. Place another sheet of phyllo on top and repeat the procedure. Keep repeating until you have the five layers of phyllo ready. Place them in the bottom of the pie pan.

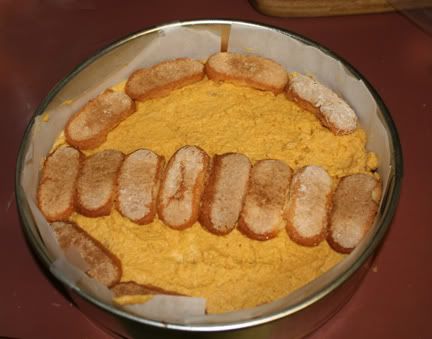
Cover the bottom layers of phyllo with the chicken filling.


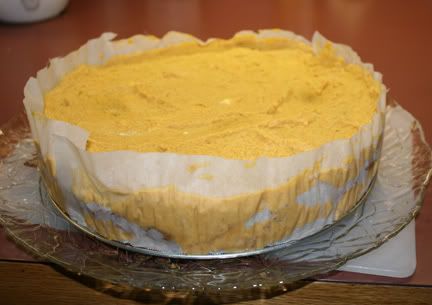
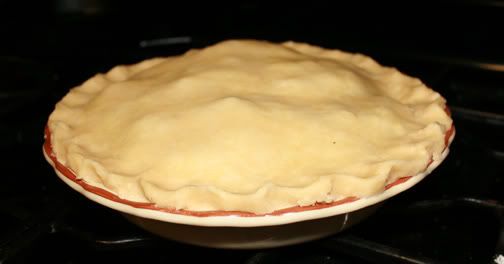
With the top layers of phyllo, use the same procedure of buttering the dough and sprinkling with the sugar-almond mixture until all five layers are ready. Place them on the top of the pie and tuck in any extra edges into the pie pan. Top with the remaining sugar-almond mixture.


Bake the pie for 35-40 minutes, until the top is golden brown.


Saturday, February 7, 2009

ChocoLee in Boston's South End


I was browsing through Boston.com the other day and saw their story on Boston's best new restaurants. The very first picture in the slideshow was of ChocoLee chocolates. And in the description it read, "Be sure to sample the main draw, offered only on the weekends: beignets oozing with a ganache of dark chocolate and mascarpone. "

Well, they didn't have to tell me twice! I was all over that, immediately emailing several friends trying to find one who would go with me on Saturday.

I had figured that since ChocoLee was listed as a best "restaurant" and they had beignets, that there would be seating with a small selection of drinks and pastries. But while there was no seating and no menu, it was absolutely worth the trip into Boston's South End.

ChocoLee is located at 83 Pembroke Street, which is right around the corner from Tremont Street. If you drive in, you'll need to park on Tremont Street and have plenty of quarters to feed the meter. If you take the T, the Back Bay orange line station was within walking distance.

I did love the large metal bowls of "chocolate" and monster-sized whisks in the windows.


One can't help but notice the magazines full of praise for Chocolee that are displayed near the above window. There was also one of those Boston's Best signs from the well-known annual poll of Boston residents.


There were two women working behind the counter. They were very friendly and approachable. I mentioned that I had a food blog and asked if I could take pictures, and they didn't hesitate to let me.

They did not know of the Boston.com Best of the new restaurants story. I mentioned that I had driven in from Worcester County and they asked if I came into town just for their chocolates. I should have just fessed up and said yes, I did. But I made myself look like less of a chocolate freak and I mentioned that I decided to make a day of it and meet friends there for those chocolate beignets and lunch somewhere. Just then, my friends Karen and Jon walked in the door.

They make the beignets to order right there. They were nice and hot when they handed my order to me in a bag and warned me that the liquid ganache inside was very hot and to be careful. My mouth was watering. Not only did I get the beignets, but also a number of their delectable looking chocolates. I like being able to choose which kinds I want instead of being forced to buy a pre-packaged box of the flavors someone chooses to give me.

The chocolates were in a glass display and were fresh. In fact, there were more freshly made chocolates on the counter top behind the display. They make the chocolates right there, daily!


I loved the chocolate pod displayed on the top of the counter next to the chocolate dipped strawberries (the pod was a replica).


For the chocolates I got lavender, toasted sesame, lemon curd, lime curd, ginger, vanilla ganache, cardamom, chile, lemon pistachio, salt caramel, and I think the last one was cherry cordial. I should have written down the exact names, but I wasn't thinking. So those are my approximations of the names of the flavors.

I've had three of my chocolates so far, and each one has been wonderful. I like that they had flavors that weren't chocolate inside and out. The lemon curd was exactly that - lemon curd inside a delicious dark chocolate shell. The lavender was in a white, creamy filling. I loved it as well. The third one I had was what I think was cherry cordial. All of the chocolates were incredibly satisfying and as fresh as could be.

But lets get on to the beignets! As soon as we walked outside the door, we all dug into them. It was hard to take this picture without gorging on this little dough ball filled with chocolaty goodness.


And here's the glorious inside:


OMG! It was pure heaven!!!!! But they must be eaten carefully! If you don't bite into it correctly, the chocolate ganache squirts out. So my advice is to tear off a bit of the dough to expose the chocolate without putting pressure on it! At that point, Jon sucked the chocolate out of the beignet, while Karen and I just put the entire thing in our mouths. It was totally chocogasmic!

I won't hesitate to go into Boston again - just to visit ChocoLee, and for no other reason but pure chocolate indulgence.