Saturday, January 30, 2010

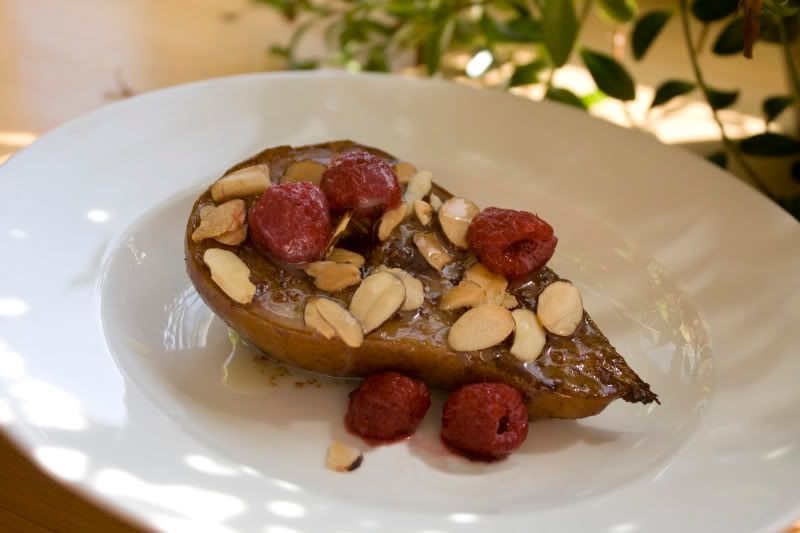
Roasted Pears Topped With Almonds, Raspberries, and White Chocolate Yummies


I'm so happy that this is my first recipe of 2010. It represents the way I'd like to cook and eat this year.

First of all, it's absolutely delicious! And it looks elegant, so you can serve it at the finest dinner party. Another plus was that it is quite simple. There really aren't a lot of ingredients, and you can have everything ready to assemble by the time the pears come out of the oven.

I don't know about you, but I need the "simple" in my cooking repetoire. My life is overwhelmed with minutia. But I do not want to cook the semi home made way. I want to cut down on processed foods and overwhelming amounts of sodium and chemicals. I believe that foods taste better when they are natural, and I feel better about eating them.

I decided to use organic frozen raspberries for my version of this recipe. It's the dead of winter, and while fresh raspberries were available, they were quite expensive and the quantity was small. I got about twice the amount of rasperries, and with the juice, I was able to make a 2nd sauce - a raspberry reduction. Here it is in all it's juiciness:
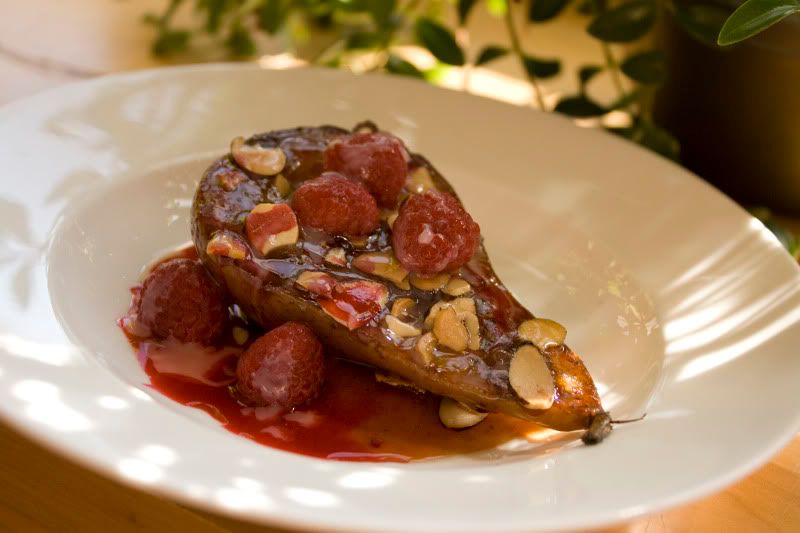

It was pretty spectacular. If you want to make the sauce, just though the raspberries. Strain out the juice while preserving the best of the berries for decoration. With some of the less-beautiful berries, put them in a sieve and use a rubber spatula to press out all the juice. You would be smooshing the berries to do this. Then put the juice in a small saucepan and boil it down to about 1/2 of the original amount of juice. If you wanted to, you could add some sugar. I didn't.

This recipe uses Vietnamese Cinnamon, aka Saigon Cinnamon. It is not the same as regular cinnamon - it's more pungent and complex. Maybe some of you can buy it in the grocery, McKormick does distribute it. But I prefer to order my spices online. I get mine from Penzey's Spices. They do have a few stores, which I hear are an incredible experience, but they also ship. My link is to the Vietnamese Cinnamon, but they sell every kind of spice, and they are fresher than anything you can buy in the grocery store, and most likely much cheaper per weight.

  • Penzey's Spices: A jar of 1/4 cup (7 ounces) of the cinnamon is $3.25.

  • McKormick on the shelf at Stop and Shop supermarket: only 1.5 ounce (the regular tall-size glass jar) costs $5.98.

  • Amazon.com: Spice Islands Saigon cinnamon, the same size (7 ounces), is 5.80.

  • King Arthur Flour: just 2 oz. cost $4.50


Roasted Pears Topped With Almonds, Raspberries, and White Chocolate Yummies

Inspired by Cat Cora (for McKormick)

1/3 cup brown sugar, packed
1 teaspoon Vietnamese cinnamon
1/4 teaspoon nutmeg
1/4 teaspoon ground cloves
2 pears, firm, halved with cores removed
2 tablespoons butter, melted
3 tablespoons heavy cream
2 ounces white chocolate, chopped
1/2 cup sliced almonds, toasted
fresh or frozen raspberries

Preheat the oven to 400 degrees. Place the pear haves, cut side up in an 8 x 8 inch baking dish sprayed with cooking oil. Brush the tops with butter and drizzle some more into the cavity, but leave as much as you can for later (I used half the butter).

Mix the sugar and spices in a small bowl and then sprinkle half of the mixture evenly over the pears.

Bake for 15 minutes. If your butter, sugar, and spices have fallen off of the pears, use a brush or spoon to baste the pears with it again. Sprinkle the remaining sugar mixture on top, drizzle with the remaining butter, and bake for another 20 minutes, or until the pears are tender.

While the pears are cooking, bring the cream to a boil in a small pot over medium heat. Take the pot off of the flame and add the white chocolate, stirring until it is melted and the sauce is smooth.

To serve, place a pear half on a dessert plate or shallow bow. Spoon any of the butter/sugar mixture from the pan over the tops and sprinkle with the almonds. Then drizzle the cream and chocolate mixture over it and top with the berries.

Roasted Pears Topped With Yummies

I'm so happy that this is my first recipe ...

See Roasted Pears Topped With Yummies on Key Ingredient.

Friday, December 18, 2009

Winter Squash- Black Bean Bake with Meat


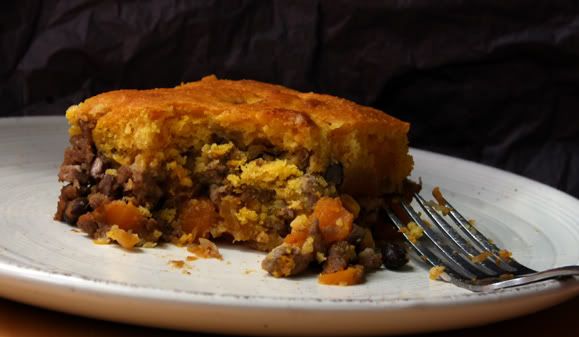
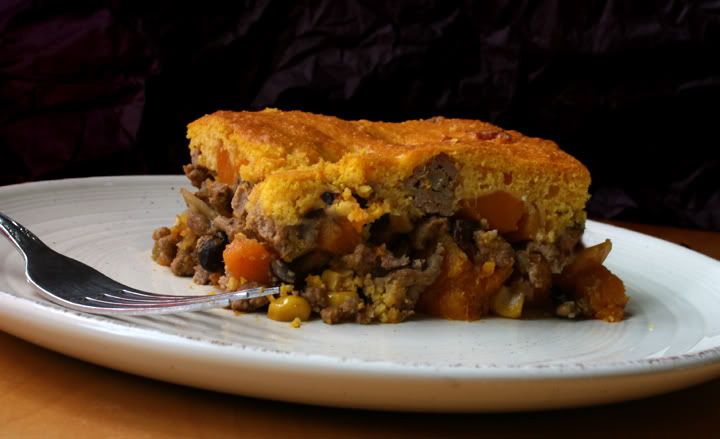
Watch out! This casserole is dangerous . . . . Dangerously irresistible, that is! I've made it twice in the span of a week, and I'm about to make it a 3rd time.

The first time, Joe and I ate it. And we did a good job of it. It was mostly gone the first night. Definitely gone the next day.

I made it yesterday to give to a friend, but as I was finishing the meat part of it, Joe called and said he needed a dish for his office Christmas party the next day. So since it was already made, he got that batch and I'm about to make it a third time for my friend whose husband is in the hospital. I figure she doesn't want to cook right now, and she will enjoy and appreciate some healthy and delicious home cooking. And her husband will probably be able to eat it since it is fairly healthy (he had heart surgery). While the original recipe called for beef, I made it once with ground turkey and once with ground chicken and both were wonderful.

I'm looking forward to the little bit extra that won't fit in the pan that I will put in a little loaf pan for myself (he he he).


Winter Squash-Black Bean Bake with Meat
Inspired by Better Homes and Gardens

1 lb. ground turkey or chicken
3 cups of 1/2-inch pieces peeled butternut squash
1 medium sweet onion, chopped
1 15-oz. can black beans, rinsed and drained
1 cup whole kernel corn (I used canned)
1 4-oz. can diced green chiles
1/2 tsp. salt
1/4 tsp. freshly ground black pepper
1 tsp chili powder
1-1/2 tsp chipotle powder
a dash cayanne
1 cup lower-sodium beef broth
1 3-oz. pkg. cream cheese, softened
1 8-1/2-oz. pkg. corn muffin mix (the Jiffy mix is 8 1/2 ounces)
1 egg, lightly beaten
1/3 cup milk (I use 2%)
1/3 cup canned pumpkin


Preheat the oven to 400 degrees.

In your biggest skillet, sautee the squash and onion with the salt and pepper until the onion is tender and golden and the squash is close to a point where it could be eaten - sort of like it's aldente.

In a separate pan, cook the meat. I find it helpful to cook it in a little bit of water. It breaks apart easier. Drain off the liquid and fat.

Add the meat to the veggies. With it, add the broth, beans, corn, green chiles, and the spices. Heat it all through and then Transfer mixture to 2-1/2-quart baking dish.

In medium bowl stir together the corn muffin mix, cream cheese, egg, milk, and pumpkin puree until just combined. Spoon over beef mixture.

Bake the casserole for 20 minutes or until toothpick inserted into topper comes out clean.


Winter Squash- Black Bean Bake with Meat

Watch out! This casserole is dangerous . . . . Dangerously irresistible, that is ...

See Winter Squash- Black Bean Bake with Meat on Key Ingredient.

Tuesday, December 15, 2009

Easy Pumpkin Tiramisu


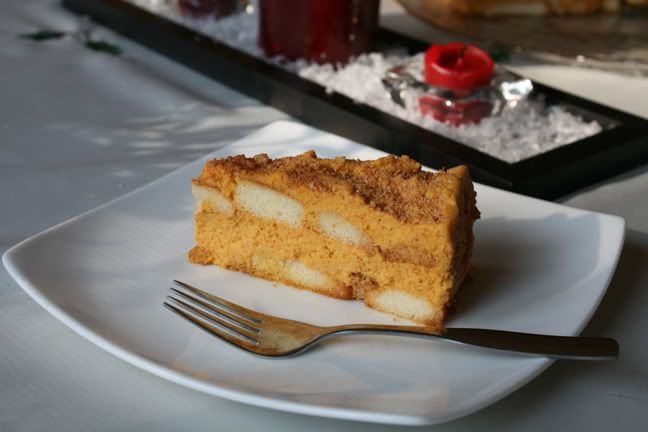
This pumpkin tiramisu was an absolute success, and yet it was so easy to make! My friends were visually impressed and quite happy when it made its way to their plates and then into their mouths. Even several days later, when I brought the last piece, which I saved and guarded with my life, to my friend in CT the night of her holiday party, it was still working it's magic. Linda scoffed it down instead of going for any of the desserts on her table, and raved over it.

In short, you should make this!

It was so easy to make, I made it one-handed. As my life is always full of drama, I broke my wrist in two places the weekend before Thanksgiving. So between my one good hand and my KitchenAid mixer, I was still able to make this. Typing up the blog post was another story - it got delayed until now.

As for the ingredients, let me just write about a couple of them. First, the ladyfingers. I guess the ladyfingers that are traditionally used in tiramisu are somewhat crunchy. So, if you are like me, you won't find crunchy ladyfingers at your grocery store. I only had the soft ones available to me - the kind you put in a trifle. To remedy this, you will have to toast them in the oven. I put them in the oven at 350 degrees for 7 minutes.

The other ingredient I want to mention is the amaretti cookies. I've seen them at Ocean State Job Lot. I got them at a specialty market because I was there and so were they. But if you can't find them, I saw reviewers of the original recipe write that they used ginger snaps. Amaretti cookies are great. And I totally loved eating the leftovers. But hey, if you can't get them, you can't. I would imagine that ginger snaps would be an awesome replacement.

Ooh, there's one more thing I want to mention. Don't skimp on the rum! By the time you eat it, it won't taste too boozy. In fact, I felt it added an essential flavor. When I used it, I used a small nip bottle and covered most of the opening with my thumb as I splashed drips onto the ladyfingers as evenly as possible. The rum was really a wonderful flavor when we dug into this tiramisu.

Do make this the day before you plan to serve it. And then use some self-control. It will be totally worth it!


Pumpkin Tiramisu
Bon Appétit

1 2/3 cups chilled whipping cream
3/4 cup powdered sugar
1 (8-ounce) container mascarpone cheese
1 (15-ounce) can pure pumpkin
1 1/2 teaspoon pumpkin pie spice *
2 (3-ounce) packages halved ladyfingers - crisped
1/4 cup dark rum (or regular if that's what you've got)
2 ounces crushed amaretti cookies (if you can't get them use ginger snaps)
Powdered Sugar

* No pumpkin pie spice? No problem! Just mix 2 tablespoons each of cinnamon and ground ginger with 1 tablespoon ground nutmeg and 1 tsp ground allspice.


Beat the whipping cream and sugar until peaks form. I beat it till stiff peaks formed, but I recommend that you don't. Aim for softer peaks. Then add the mascarpone cheese, pumpkin, and pumpkin pie spice. Mix it until it's smooth and all the ingredients are well-blended.

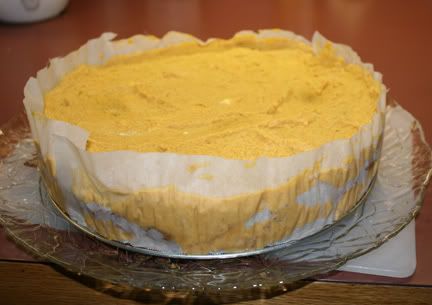
Line the bottom of a 9-inch-diameter spring form pan with parchment paper. It might be good to make the parchment paper a little too wide. That way, when you put the finished tiramisu on a serving plate, you can slide it off the bottom of the pan, while someone tilts the metal disk toward you. Also, put parchment paper around the sides of the pan.


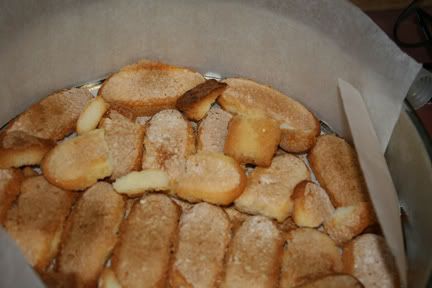
Crisp your ladyfingers in the oven if they are soft. I put my oven at 350 degrees and put the ladyfingers in for 7 minutes.

Spread out an even layer of ladyfingers to cover the bottom.even with 2 3/4-inch-high sides with 1 package ladyfingers, overlapping and crowding to fit. I regret that mine looked so messy. Were I to do it again, I would make this bottom row much neater, more like the 2nd row of ladyfingers looks (you will see that photo soon).


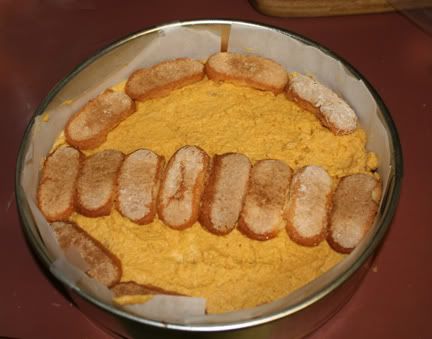
Sprinkle the ladyfingers with approximately 2 tablespoons of rum. Then, spread almost half of the leftover filling over ladyfingers. What I'm getting at is that if it's possible, it would be great if you can save some of the filling to spread it on the sides once you put the entire tiramisu on a plate.

Repeat with second package ladyfingers. Doesn't it look so much neater?


Sprinkle the new layer of ladyfingers with the remaining 2 rum. Top with much of the remaining filling (trying to save some for the sides) and smooth it on the top. A little trick you can use if the smoothing isn't going so well is to spray the bottom of you plastic spatula or spoon with cooking oil spray. That will keep the filling from sticking to it, allowing your top to be smoother.

Note: I didn't save any filling for the sides. You may notice that in my photos. That's why I recommend that you do. It doesn't need to be a lot. Most of the sides will have filling already. I'm recommending that you reserve maybe 1/2 cup.


The next day, put the spring form on a serving plate and release the sides of the pan and remove. In this photo below, you can see how I over-whipped my whipped cream. The top layer of mine was very thick. That's why I'm recommending soft peaks.


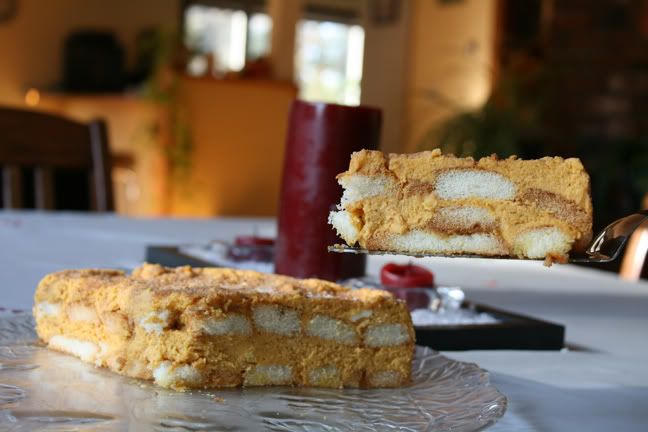
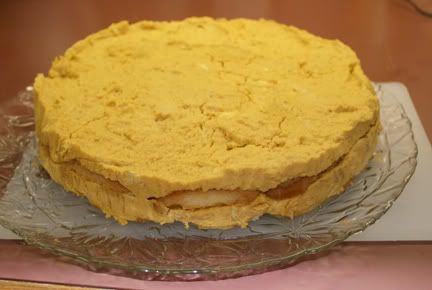
My husband helped me here to tilt the serving plate, while I lifted the tiramisu with a spatula and carefully grasped the parchment paper underneath it and took the entire tiramisu off of the bottom of the spring form and the parchment. Now my tiramisu was directly on the glass plate. It would have been even easier if the bottom layer of parchment was a little bigger than the pan - even if only in one area.

In this next picture, you can see where I wish I had that leftover 1/2 cup filling:


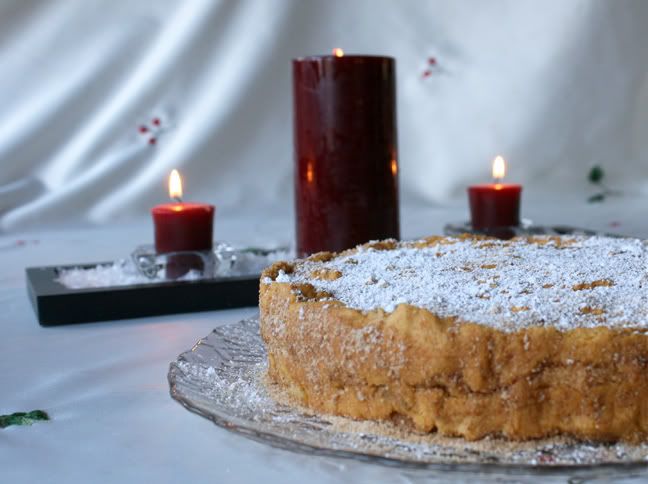
Grind up the amaretti in a food processor or crush it in a bag. Decorate the top with it. Perhaps even the sides. I put some on the sides to cover up flaws.

I sprinkled with powdered sugar just before serving.


pumpkin tiramisu

This pumpkin tiramisu was an absolute success, and yet it ...

See pumpkin tiramisu on Key Ingredient.

Wednesday, November 4, 2009

Red Lentil and Butternut Squash Soup

red lentil and butternut squash soup

Before I get to the food, let me address this important issue. Where have I been?

Well, I've been very, very busy getting a certificate in Web Design - the first step in a hopeful career change. So I've been crazy in over my head as I learned all about css, page design, flash, using available java scripts, jQuery, a bit about XML, and table-driven and css-driven DHTML.

I haven't cooked much beyond boxed pizza in months. The freezer has been full of frozen meals and I've been thrilled about the invention of the microwave. We didn't have those things when I was a little kid!

But on to the food!

This recipe happened by mistake, as I got punished by my bad karma.

Several weeks ago while out taking
fall pics, I stopped in at one of my favorite foodie destinations, Idylwilde Farms. I saw the soup mixes on the shelves and couldn't resist. You know, the dry soup mixes - the ones with the dried beans in a clear cellophane bag, and then at the top are the herbs and such. You add some stock and veggies. Here's a pic of one of the mixes I got:

soup mix

Well, I bought about four of them because I thought it would be like homemade goodness, but with convenience. Also, they make rather large batches, I could do it in a crock pot and freeze individual meal-sizes that I could just reheat when I felt like it and have comfort food any time.

The first one I made was the beef stew pictured above. And it was delicious. But as I made it I felt like an idiot. I spent so much time sauteing the onions and peeling and cutting up yellow turnip. I thought to myself, "Meryl, what you are doing now is the time consuming part of making anything. You could have made your own stew and made this a blog post and been proud of your creation instead." But it was too late for that.

So a couple of days ago I figured I'd use another of the mixes - this time the Red Lentil and Butternut Squash soup mix. But I got bitten in the rear by bad karma!

So, I was kicking myself as I cut up and seared some chicken, sliced and sauteed the onion, and cubed the butternut squash. But I thought that I must not let this soup mix go to waste. And I was sure it would taste good.

I put all the chicken broth (low sodium) in the crock pot. I added the chicken and veggies, and opened up the top of the cellophane bag of soup mix. The herb packet is always at the top. I reached in, took it out, and I immediately noticed that things were hanging off of it, as if caught on a web.

I was holding it over the sink, puzzled. I thought to myself, "what is this?" as I removed it all from the little plastic herb packet. It was then that I saw the live little worms twitching around inside.

Ewwwwwwwwwwwwwwwww!

And now I've got a dilemma because the soup is already started! I had to do something right away! I remembered that I had some red lentils, so I ran to my laptop to look for my own recipe.


I began by typing in epicurioius.com to find out that my Internet went down. OMG, the Gods are totally against me today! I thought to myself, "Meryl, don't panic. Take a walk with the dogs and the Internet will be back up and running when you return."

So I did. And when I came home, the Internet was back up. I looked at various recipes on various sites and came up with a game plan. Then, I ran to the cupboards to get the lentils. CRAP! I no longer had any.

I decided to let the what was in the crock pot cook, since the chicken was in it, for the rest of the afternoon. Then I put the entire crock in the fridge that evening and went to the store, not knowing if I'd find the red lentils easily or not. Luckily I did find them and I got back to the soup the next day.

In the end, the recipe I chose was a success. Warm, cozy, seasonal, and tasty. I'm glad that I made it and not the mix, although I could have done without the roller coaster ride.

Red Lentil and Butternut Squash Soup
(a crock pot recipe that makes 8-10 servings)

10 cups broth (I use low sodium - by the way, how big is your crock pot?)
a bag of frozen chicken breasts – and olive oil (large bag - approx 8-9 breasts / 3lb?)
a bunch of scallions

olive oil
1 onion sliced
1/2 can light coconut milk *
1 tbs garam masala ** (mine was old)
1 tsp red madras curry
1 tsp cumin
2 cups red lentils (added in last - cooked for about 2-3 hours, tasting for doneness)
salt (I added 1 tsp - I'm very sensitive to salt. I'd suggest 3 tsp for normal people)


* The coconut milk was great. If I were to remake, I'd add the whole can.
** My garam masala was quite old. But even if it were fresh I would still try the entire tablespoon. I bet it would be awesome. But if you are wary of that, you could go with 1.5 teaspoons.

Okay, if I were making this today, all in one day, this is what I would do.

Put the crock pot on high and add the broth, the coconut milk, the cut up butternut squash, and the spices.

Cut up the chicken in to small pieces or slices. Sautee them and them in 1-2 tablespoons of olive oil and add them into the crock pot.

Back in the sautee pan, turn the flame on medium-high, add 1-2 tablespoons of olive oil, heat it up, and add the sliced onions. Sautee them till golden brown and then add them to the crock pot. Leave the crock pot on high for 1/2 hour to an hour. Then turn it to low for a good long time. Geeze, this is where I had it on low for about 6-8 hours and then put it in the fridge overnight.

The lentils don't need as long to cook. Red lentils will take between 1-2 hours to soften on low.

Then you have a delicious, hearty, comforting fall soup. If you put it in the fridge, you'll probably need to add more broth, it gets very thick overnight, and the crock pot can only hold so much liquid.

spoonful


Red Lentil and Butternut Squash Soup

A comforting, hearty, fall soup.

See Red Lentil and Butternut Squash Soup on Key Ingredient.

Thursday, August 27, 2009

Blueberry Pie


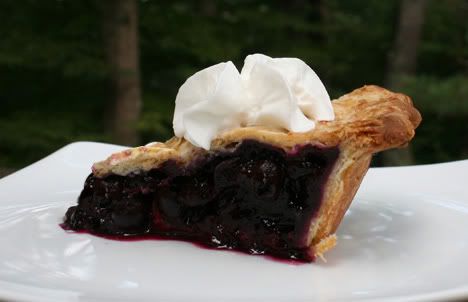
This pie rocks! It was the best blueberry pie I've ever had! I'm super proud to have made it!

That's pretty impressive since I almost never have the opportunity to make a pie. It's been years since I've made a pie, and I've never made a blueberry one. So I'm patting myself on the back and saying "good girl, Meryl."

Why, do you ask, do I never get to make pies? To begin, it's just Joe and I (and the dogs), and we struggle with weight issues. So the last thing we need around here is an entire pie sitting on the counter top. And during all the holidays when people make pies, all the pies are spoken for by other members of the family. The one or two times that I tried to add to the repertoire of pies, my pies were practically untouched, so I gave up. Perhaps I lost my pie-baking confidence as well. So, I just don't make them.

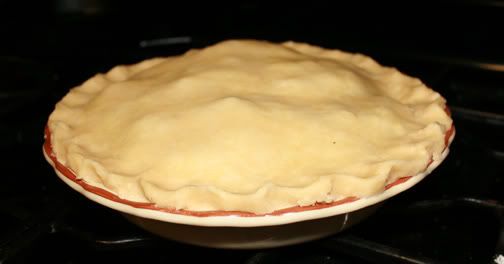
I bought this Longaberger pie plate from my friend Karen about 4 years ago, and up until last Sunday, I hadn't used it yet:


But last Sunday we were invited to a friend's for brunch. She was going to make a peach pie for dessert, and that was very nice of her! But knowing that Joe wouldn't have touched it with a 10-foot pole, I offered to make a blueberry pie (blueberry is Joe's favorite pie).


She accepted, and I thought to myself that I had gotten into a conundrum. I would have to live up to Joe's idea of a blueberry pie, and that idea was his mom's blueberry pie. Oy vey! That's a lot to live up to.

I found a well-liked recipe for a pie on Epicurious.com. Well, the filling was well-liked and the crust was not. Many of the reviewers only suggested to double the cornstarch, so I did. I accidentally omitted the butter when I made my pie, but it wasn't missed.

The crust I used came from my friend Karen. I've posted her recipe as well.

If you are looking for a great blueberry pie, look no further! This is the one.


Blueberry Pie
Filling inspired by a Gourmet Magazine recipe

6 cups blueberries, picked over
1/2 cup cornstarch
1 cup sugar
2 tablespoons fresh lemon juice
1/2 teaspoon freshly grated nutmeg
1/2 teaspoon salt
2 tablespoons half-and-half or milk (optional - to top the crust)
turbinado sugar or large-grain cane sugar (to top the crust)

Karen's No-Fail Flaky Pie Crust


Preheat the oven to 425°F.


In a large bowl toss together the blueberries, the cornstarch, sugar, lemon juice, nutmeg, and the salt. It might be easiest to use your hands so you don't crush all the blueberries. Mound the filling in the shell.

If you use the butter, place little pieces of it around on the top.

Place the top crust over it and crimp the edges.


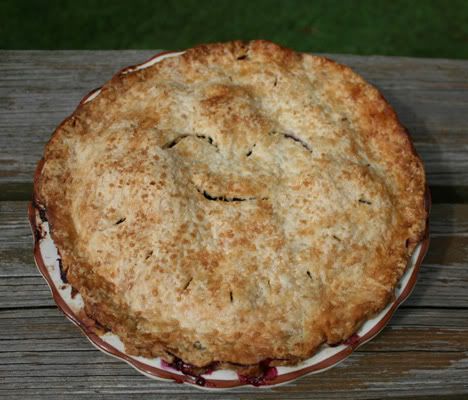
Be sure to use a knife and make air vents in the top crust. I made a smiley face with some outer slashes like short rays of sunshine. Next time I do it, I will remove slivers in the smiley face.

Bake the pie in the bottom third of the oven at 425 for the first 20 minutes. Then reduce the heat to 375 (leaving the pie where it is) and bake for another 25-35 minutes. I baked mine 30 minutes and wish I had taken it out a few minutes sooner. But it was acceptable nonetheless.